In this tutorial, we'll guide you through setting up and running live webinars on out platform.
Setting up your live webinar
The first step is to create and edit your live webinar. On the webinars dashboard, click the "New webinar" button and select "New live webinar".
From there, you'll be taken to the webinar's settings page. There you'll be able to do things like specify the webinar's title, duration, session schedule, set up your webinar's email & text message notifications, 3rd party app integrations, and also fully customize your registration, thank you, watch room, and replay pages using our powerful builder tools.

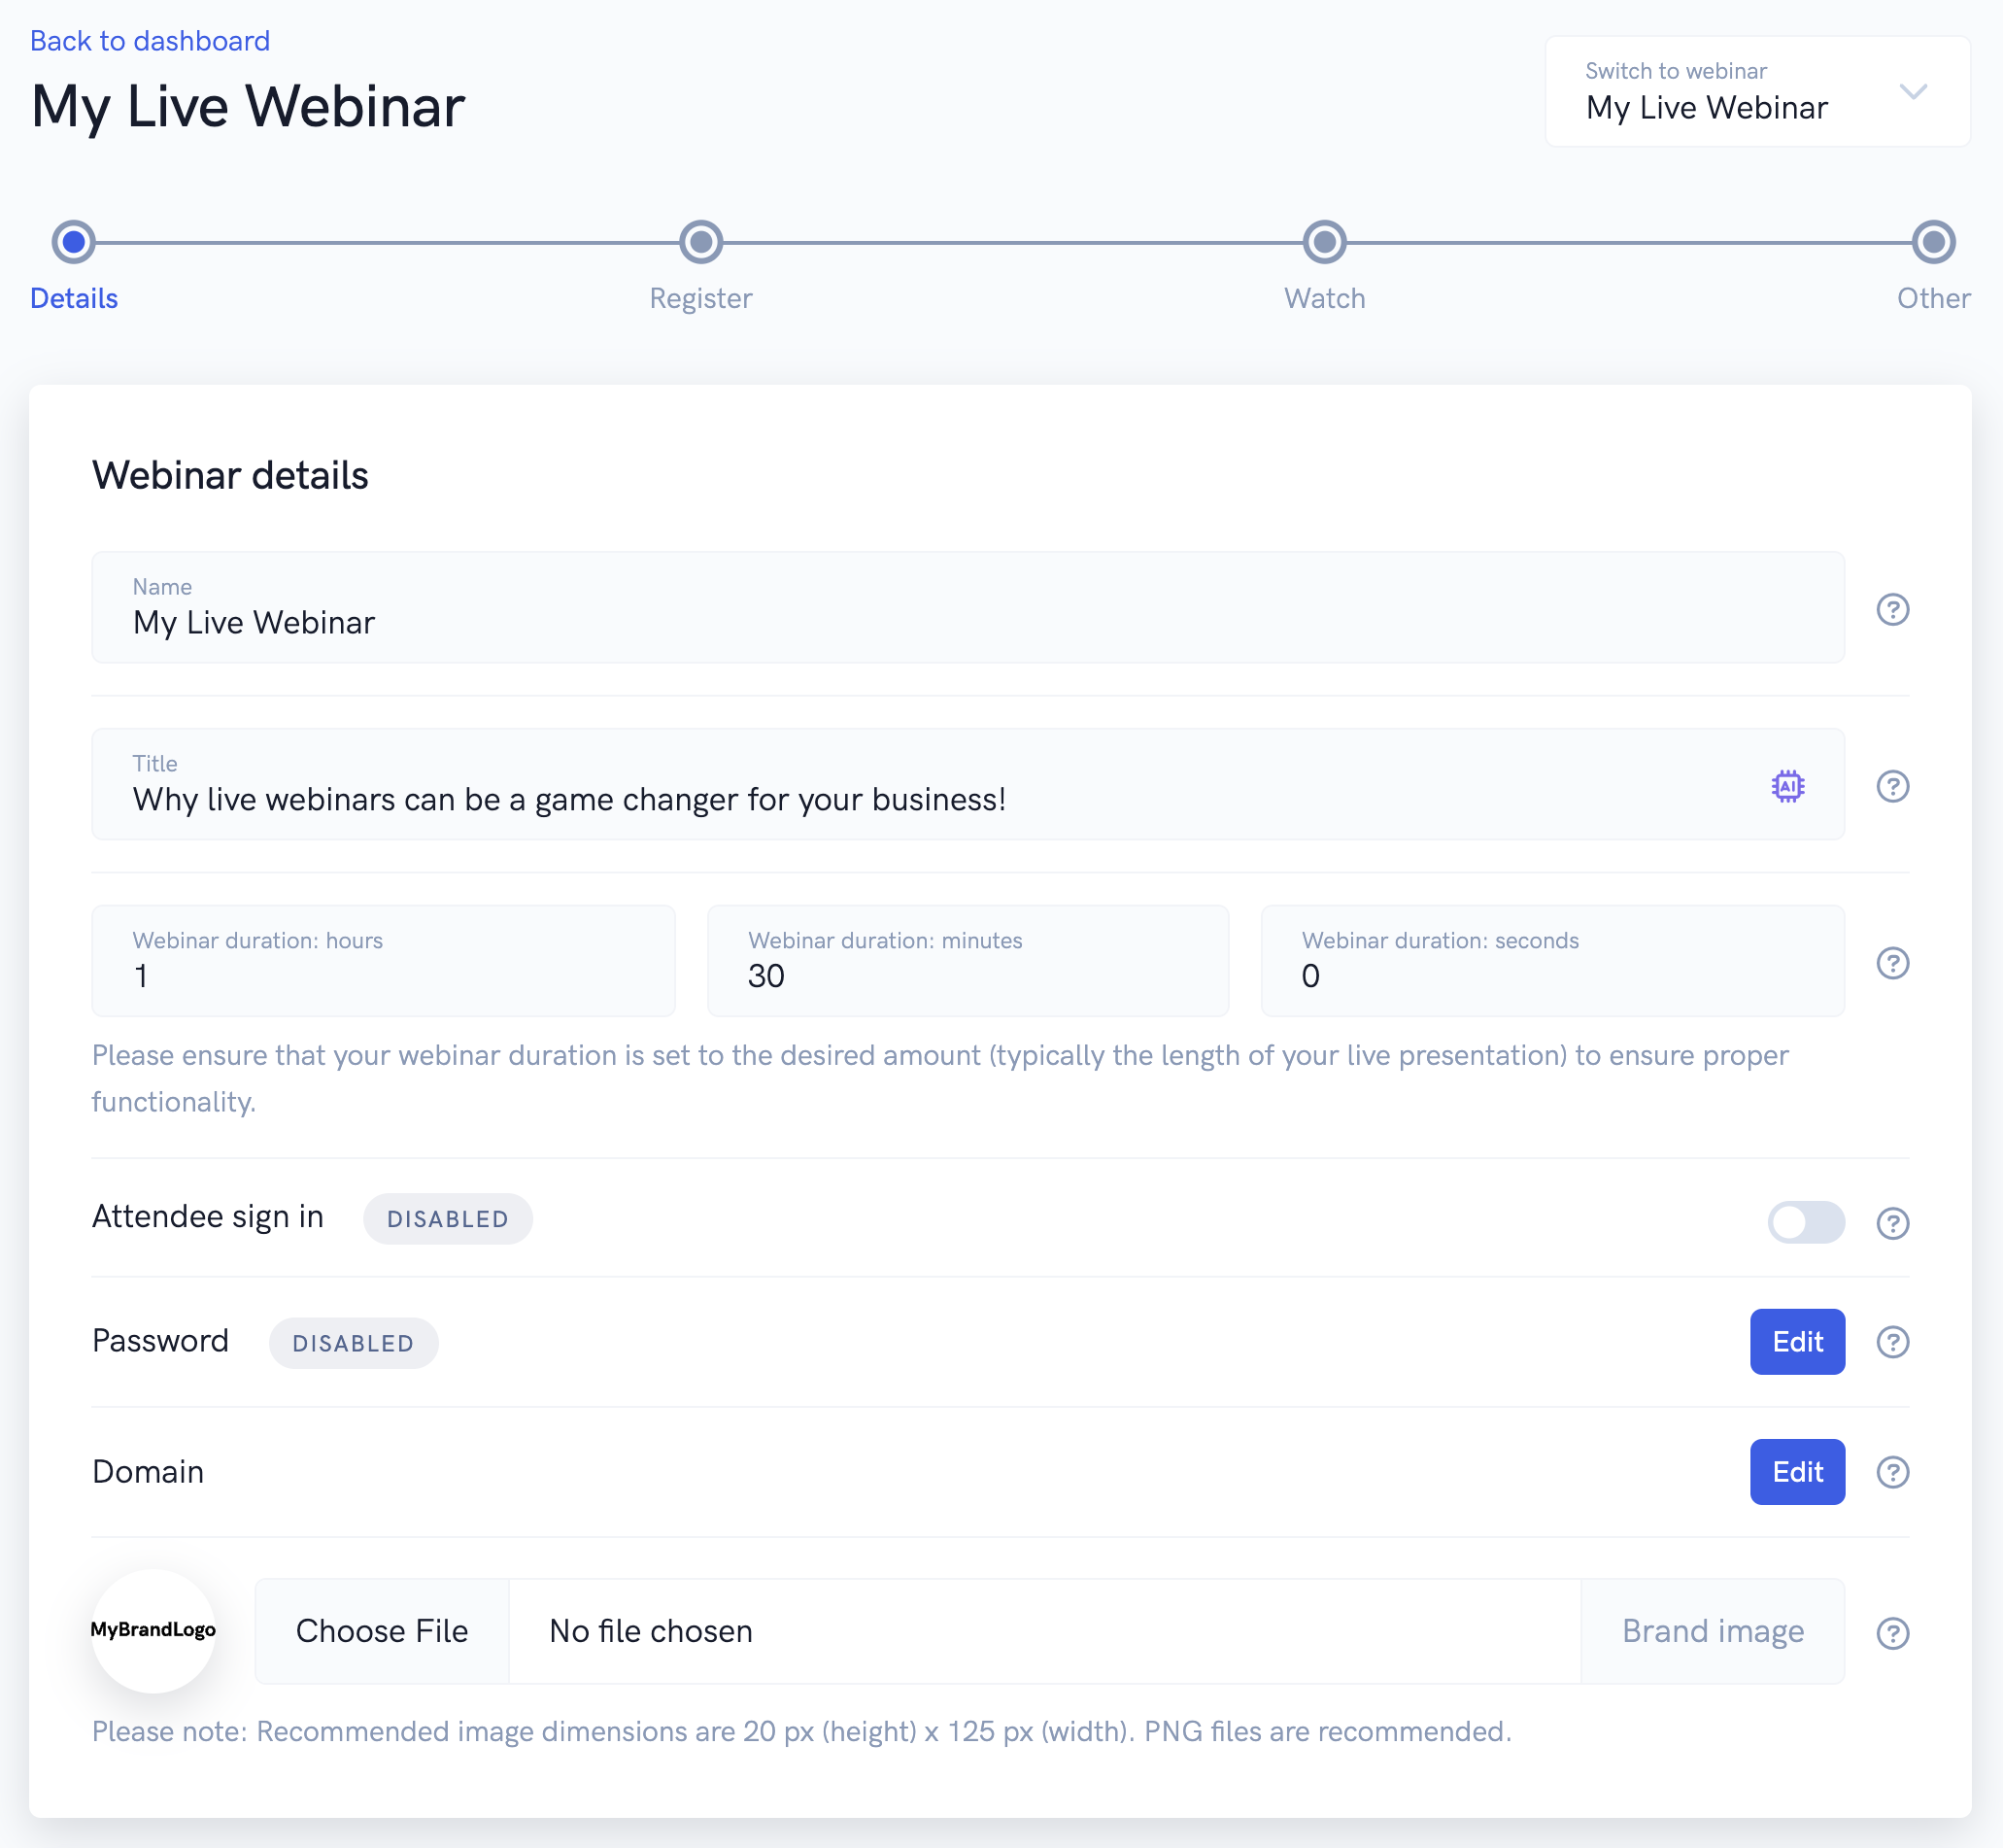
Please note: For more detailed guides on setting up your webinar, modifying your funnel pages, and tweaking the various settings at your disposal, please see our "Getting started", "How to build webinar funnels", or builder tool tutorials on our help desk.
When you're done editing your live webinar, you can return to the webinar's dashboard to get your webinar's links. Usually, you'll want to send out your webinar's registration link so that people can register for your event and get things like reminder emails and text messages.
In addition, our system will be able to collect analytics data about registrants like whether they attended the webinar, how far into the session they got, whether they clicked on your webinar offer, etc... Also, our system will display attendee names in the participant list and in the live chat box when they send messages.

If you don't care about collecting registrant / attendee analytics or the other things mentioned above, you can also just send the "non-unique" watch room directly to people when you want them to view your live presentation. For more information on this, please check out our tutorials on "watch room links" in our help desk.
When it's time to go live
When it's time for your live webinar, registrant's will be directed into the watch room from their unique session link given to them after registering (or alternatively, from the "non-unique" watch room link you've given out).
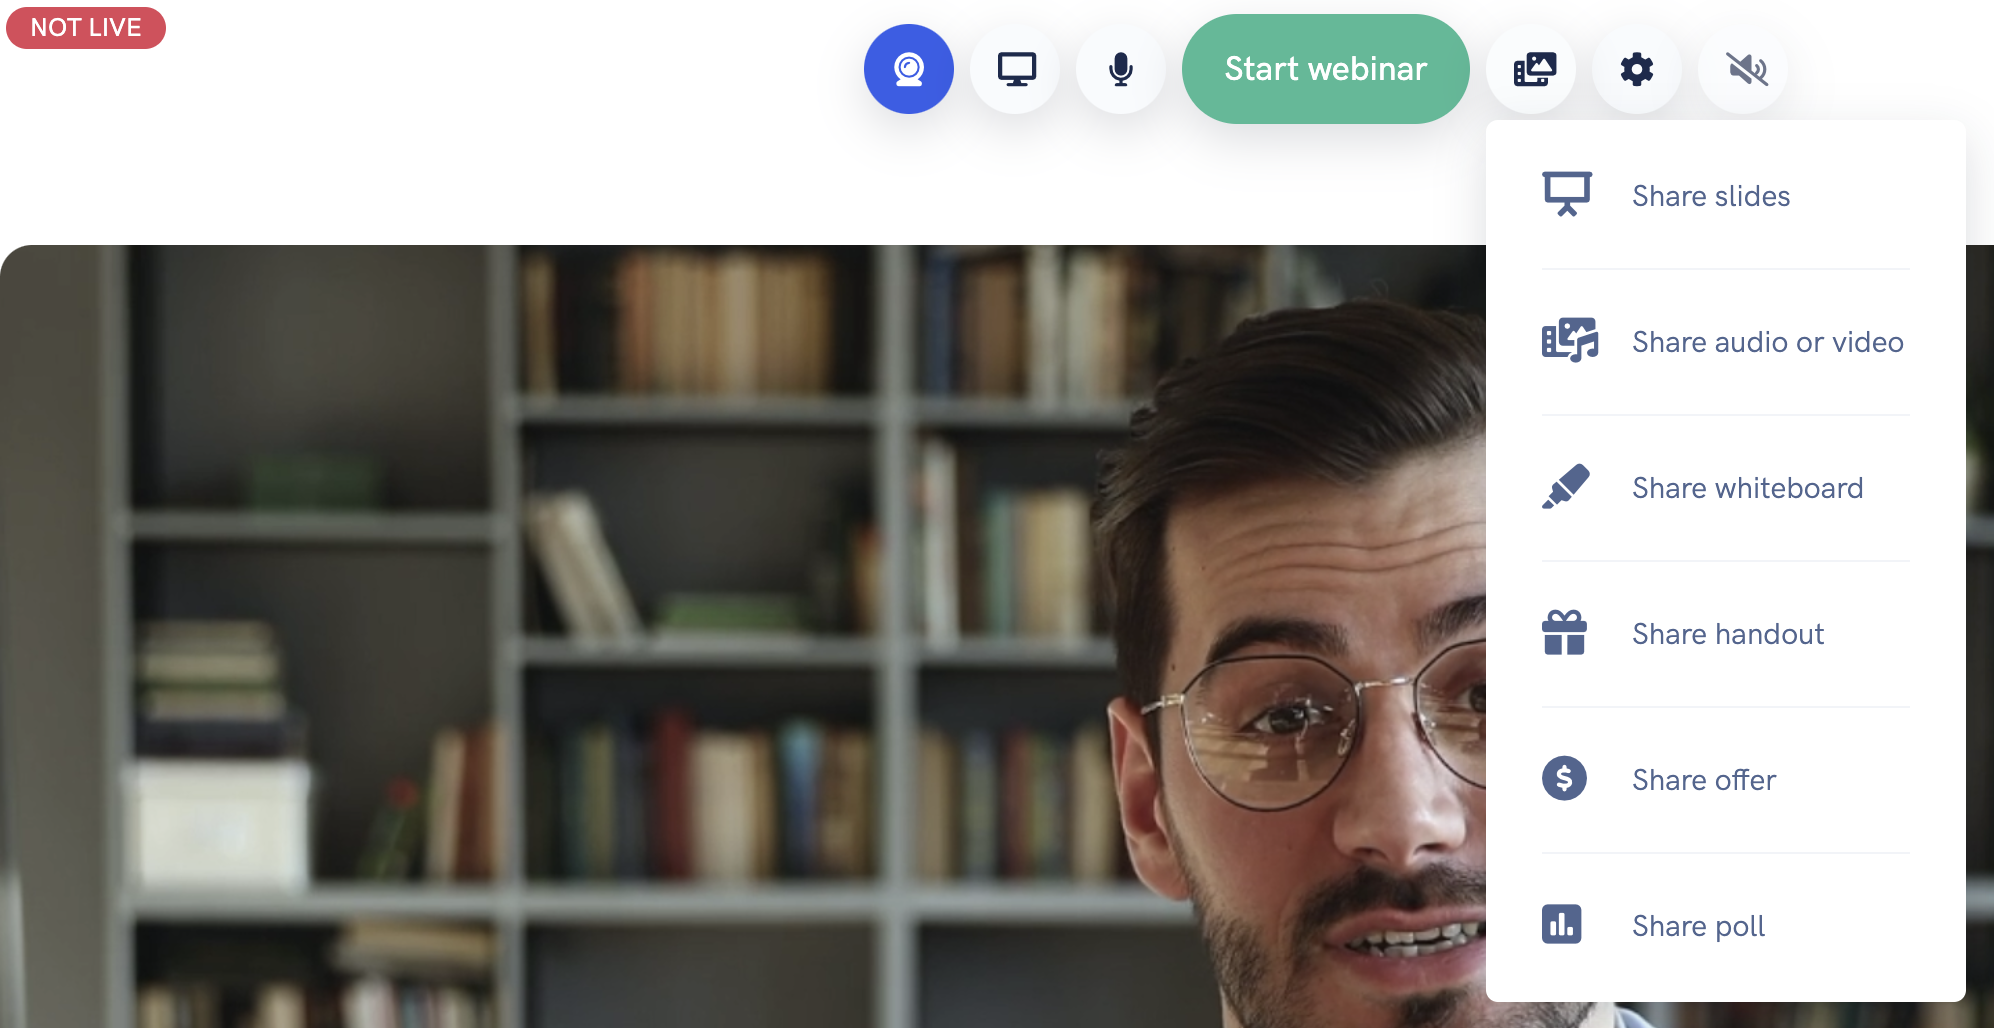
To go live to your audience, go the watch room link shown in the screenshot above. This will take you to the "admin" webinar watch room, where you'll be able to run your live presentation.
Inside the watch room, you'll have access to everything you need to run your live webinar. You'll be able to share your webcam / camera, share your screen, share slide decks, pre-recorded video & audio, draw on whiteboards, share offers, polls, and handouts, invite guest presenters and more!
Please note: To share pre-recorded video / audio or slide decks during your webinar, you'll need to upload them to our platform before going live. You can upload your media in your account's media page or from your webinar's watch room builder (coming soon).

When the you first enter the watch room, you may be prompted to grant permission to out platform to access your camera and microphone. You'll want to allow this so you can actually go live to your audience. At the top of the page, you'll find the admin controls that allow you to easily share your camera / screen / slides / offers / polls / etc...
If you want to change the camera or microphone you're using, or adjust other settings like the "corner camera" when sharing your screen or slide deck, or enable broadcasting to other platforms like Facebook or YouTube, you can do so by clicking the settings button to open the settings popup.

In the watch room, you'll also see the "Join room" button. No attendees or other presenters will be able to see or hear you until you click the "Join room" button. On the right hand side of the page, you'll see the side pane which will contain the participants tab and also things like the live chat tab, offer tab, etc...
Once you've joined the room, you'll see the option to start the webinar. This can be useful if you are inviting other guest presenters to the webinar so that you can see and speak with them before actually starting the webinar and broadcasting to your entire audience.
Once you're ready with the content you want to share, you and any guest presenters are setup, etc... and it's time to go live, simply click the "Start webinar" button to start broadcasting live to any attendees in the watch room.

During the webinar, you can seamlessly switch between sharing your camera, screen sharing, slide decks, pre-recorded video & audio, showing offers / handouts / polls, whiteboard drawings, etc... by using the admin controls at the top of the page. You can also interact with your audience via live chat box if you have enabled it for your live webinar (from the watch room builder settings).
Additionally, if you need to hide / mute your video or audio, you can easily toggle those by clicking on the relevant buttons at the top of the page.
When you're done presenting to your audience, you can end the webinar by clicking the "End webinar" button. From there, your live webinar session's recording will be accessible from the "Get links" popup of your webinar under "Recordings".
And that's it! With all of the information outlined above, you're ready to go live to your audience and knock your presentation out of the park!