Our platform makes is super easy to build your (automated or live) webinar funnel in just a few minutes! But there are also a ton of powerful customization options at your disposal. In this guide, we're going to walk you through each step of the process in detail, so that you can become a webinar expert in no time at all.
Creating a webinar
When you sign into your account for the first time, you'll be shown the webinar dashboard. On the webinar dashboard, you'll see all the webinars in your account. You'll also be shown the option to create a new webinar as shown in the screenshot below. Depending on your plan, you'll be able to create a new automated webinar, a new live webinar, or a webinar series.
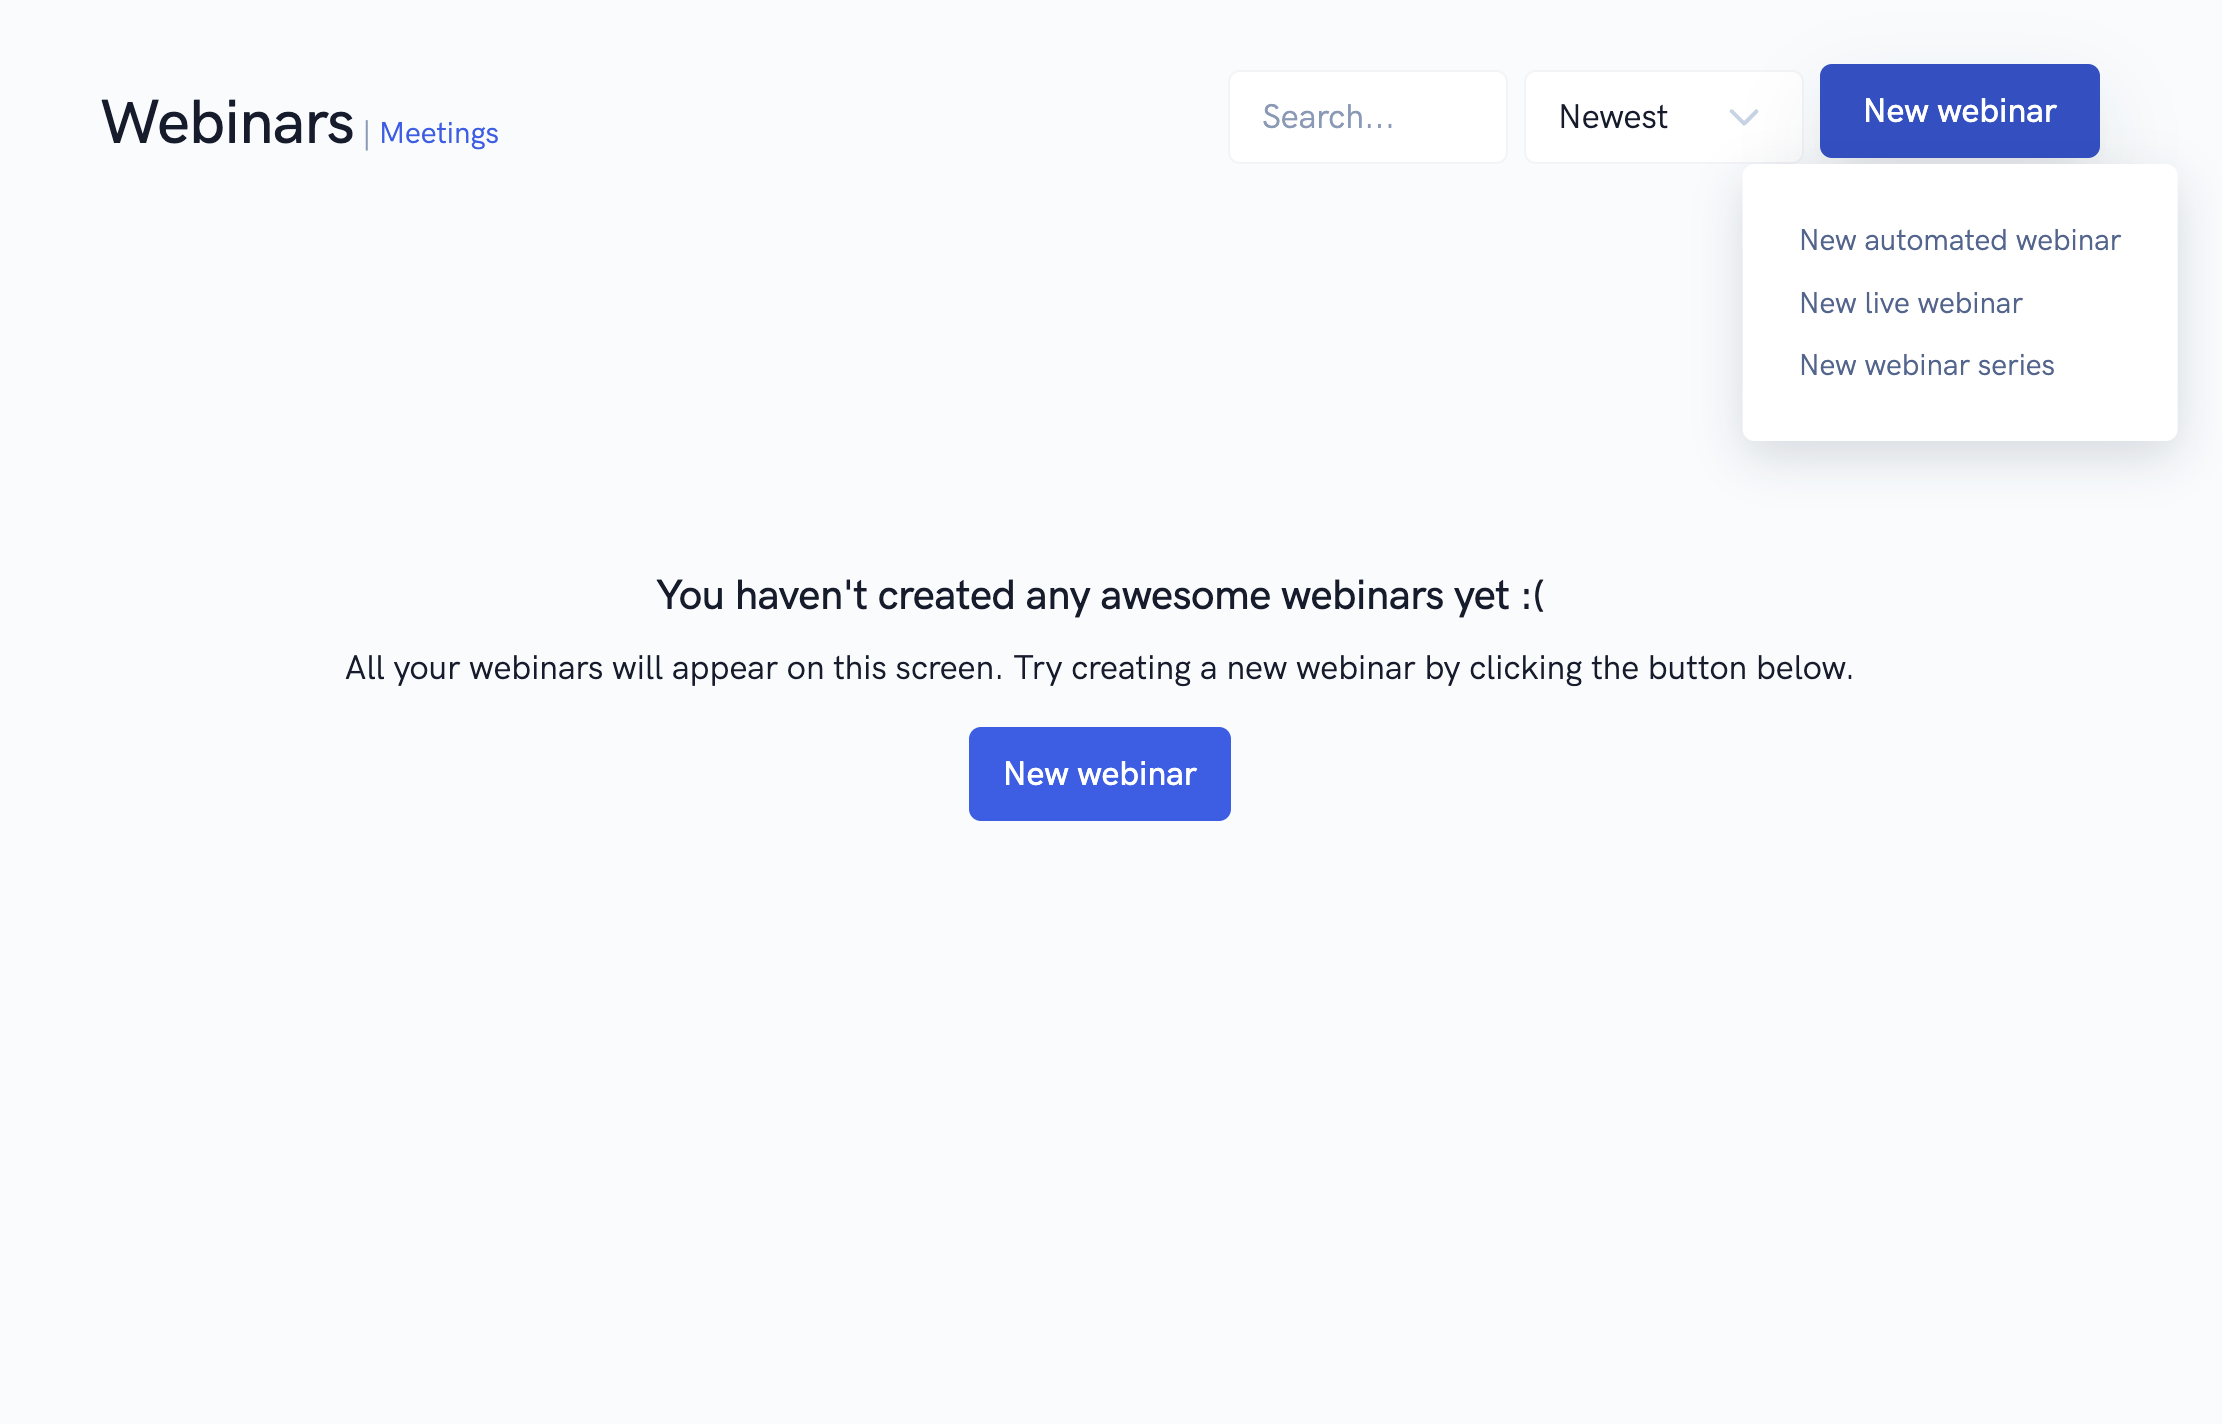
To create a new webinar, simply click the "New webinar" button and select the type of webinar you want to create from the dropdown. Once you do this, your new webinar will be created and you'll be taken to the webinar's settings page.
Editing your webinar: (Step 1 - Details)
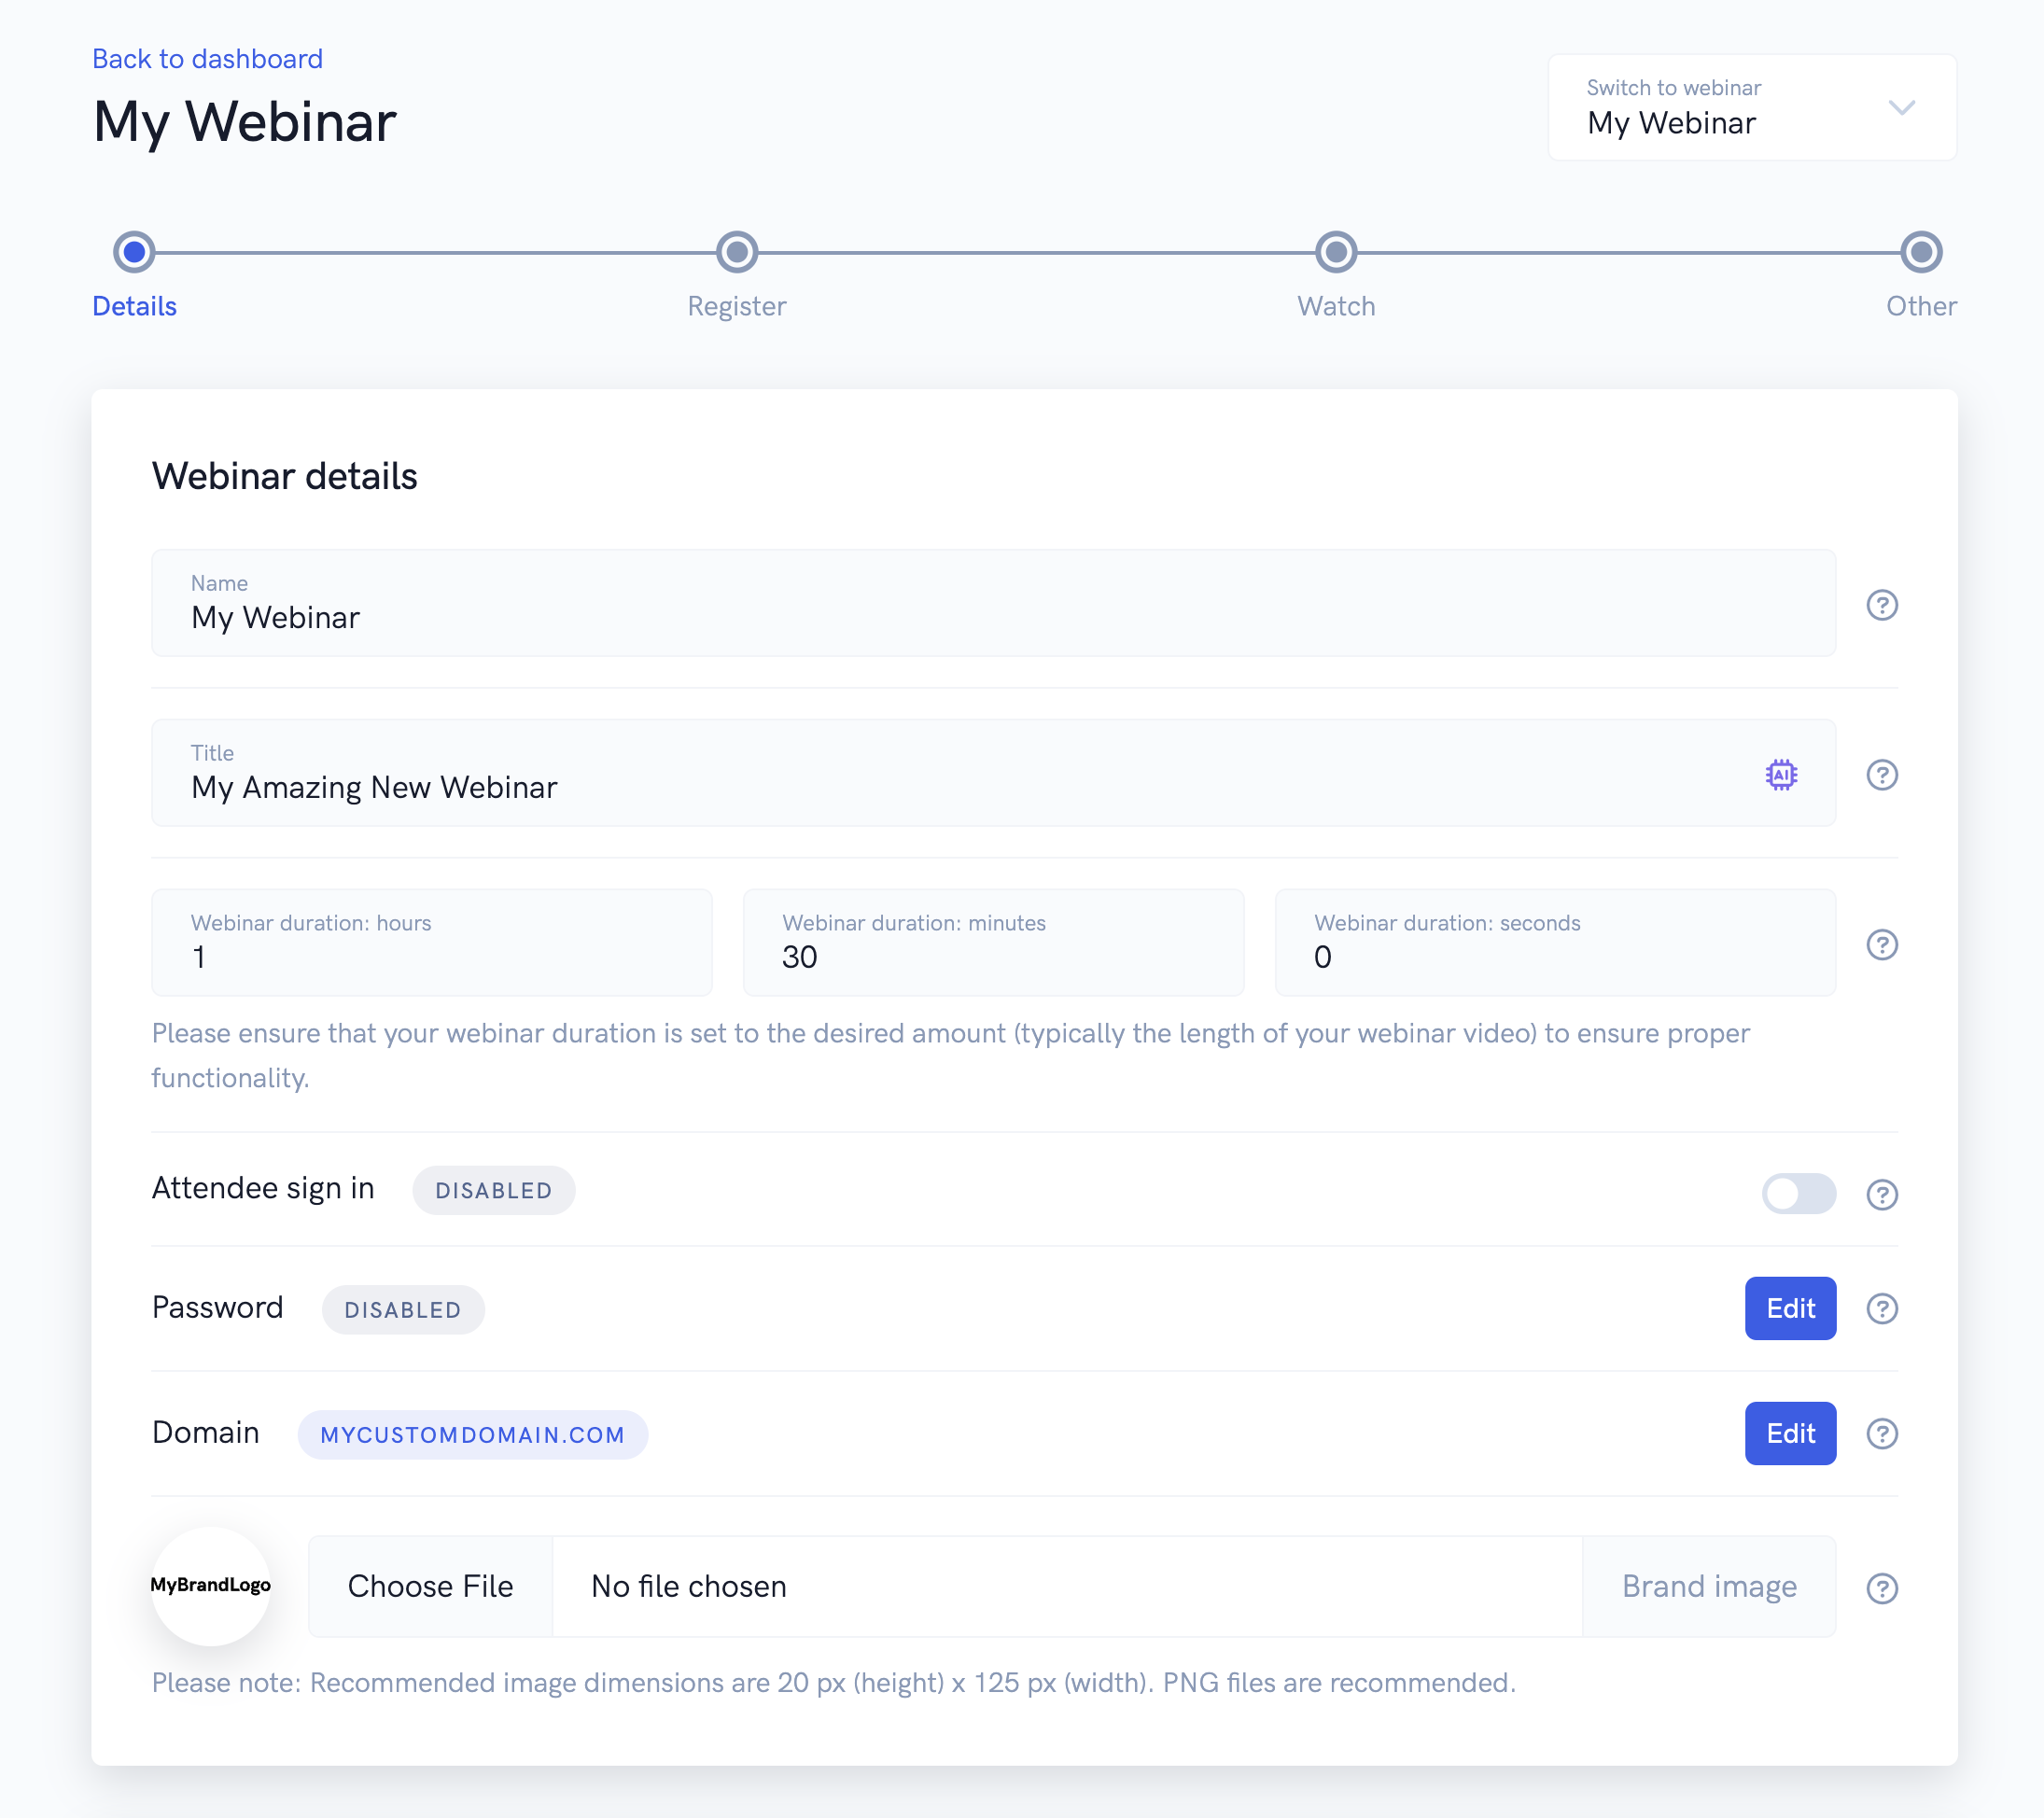
On the "details" page of your webinar settings, you'll be able to edit some basic information about your webinar as well as your webinar's session schedule. We'll outline each section and field below.
Webinar details
Name
The name of your webinar inside the software. This name is not public facing and is for internal use only (registrants and attendees won't see this).
Title
The title of your webinar. The title is public facing and can appear in places like our built-in emails, text messages, browser tab titles, etc...
Webinar duration
The length of your webinar in hours, minutes, and seconds. For automated webinars, this should typically match the length of the video you are using. For live webinars, you can use a general estimate of how long you think you will go live for during your sessions.
We recommend trying to be as accurate with the duration as possible as it does affect things like webinar analytics and also when post webinar emails, text messages, and integration events are triggered.
Attendee sign in
Enable or disable attendee sign-in when someone visits your webinar watch room or replay page. Please see our tutorial on attendee sign in here for more information.
Password
Enable or disable password protection for the webinar watch room. Please see our tutorial on passwords here for more information.
Domain
If you have a custom domain enabled for your account, you can select to use a different domain for your webinar. This will affect the various links that your registrants and attendees see when moving through your webinar funnel. Please see our tutorial on custom domains here for more information.
Brand logo
You can upload a brand logo for your webinar that will can be shown in the webinar watch room and also in built-in reminder and follow-up emails.
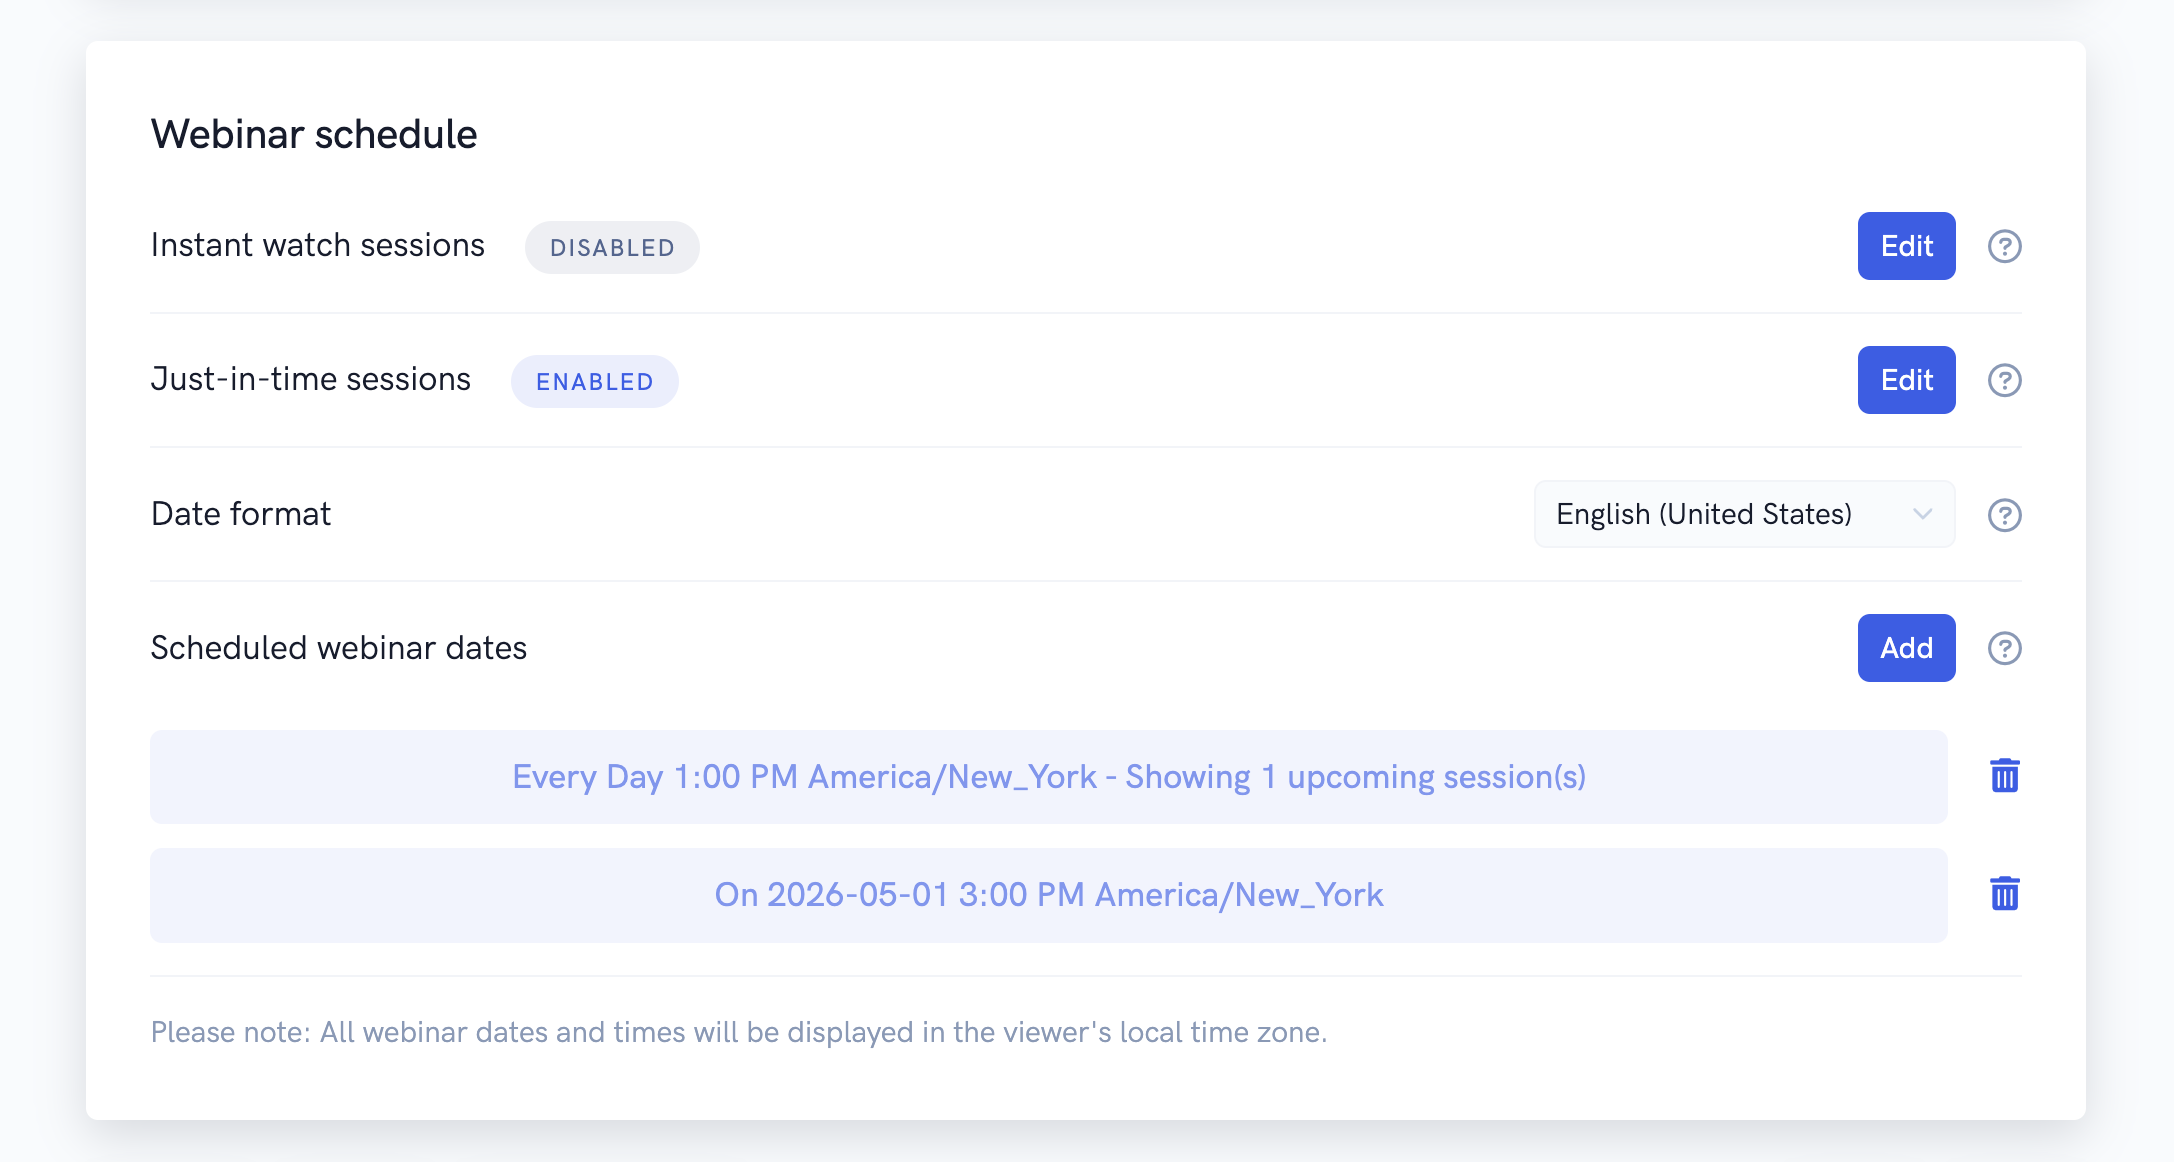
Webinar schedule
Instant watch sessions
Enable or disable instant watch sessions. With instant watch sessions enabled, an option to join your webinar right away will be added to your registration page. This allows visitors of your registration page to enter their information and join the webinar session immediately without waiting.
You can customize the instant watch session's label on your registration page and also whether it redirects to the webinar watch room (automated webinars only) OR the replay page. For example, you can change the instant watch session label to "Watch replay now!" and have the session redirect registrants to the replay page. This can be useful for allowing people to watch a previous recording of your webinar immediately instead of making them wait a long time until the next webinar session is available.
Just-in-time sessions (automated webinars only)
Enable or disable just-in-time sessions. With just-in-time sessions enabled, you can ensure that there is always an upcoming session available to register for whenever people visit your registration page. This is similar to instant watch sessions but preserves more of a "live" feeling for your webinar sessions and also can help ensure multiple people registering around a particular time are grouped together rather than at "random" times, which can help with live chat engagement.
You can customize the labels for just-in-time sessions shown on your registration page, select how many upcoming sessions you want to show, edit the amount of time in between upcoming just-in-time sessions, and choose whether to redirect to the webinar watch room OR replay page.
Date format
This setting allows you to format your webinar session dates throughout your webinar pages, emails, text messages, etc... to a particular language & country format.
Scheduled webinar dates
This section displays a list of "specific" or "ongoing" dates added to your webinar that people can register for. For example, you can add a "specific" date to your webinar of May 1st, 2026, 1 PM America - New York time.
You can also add an "ongoing" date that allows people to register for a session every day at 1 PM America - Los Angeles time.
Similar to the above options, you can customize the labels for these dates that are shown on the registration page, choose the number of upcoming sessions to display (for "ongoing" dates), and choose whether to allow people to join in-progress webinar sessions.
Once you've filled in your basic information and schedule settings, you can move on to step 2!
Editing your webinar: (Step 2 - Register)
On this step you'll be shown the option to edit your registration page and thank you page using our powerful page & embed builders. You can also select whether you'd like to use our built-in registration / thank you pages or embed a registration / thank you widget onto your own website simply by adjusting the toggles shown in the screenshot below.
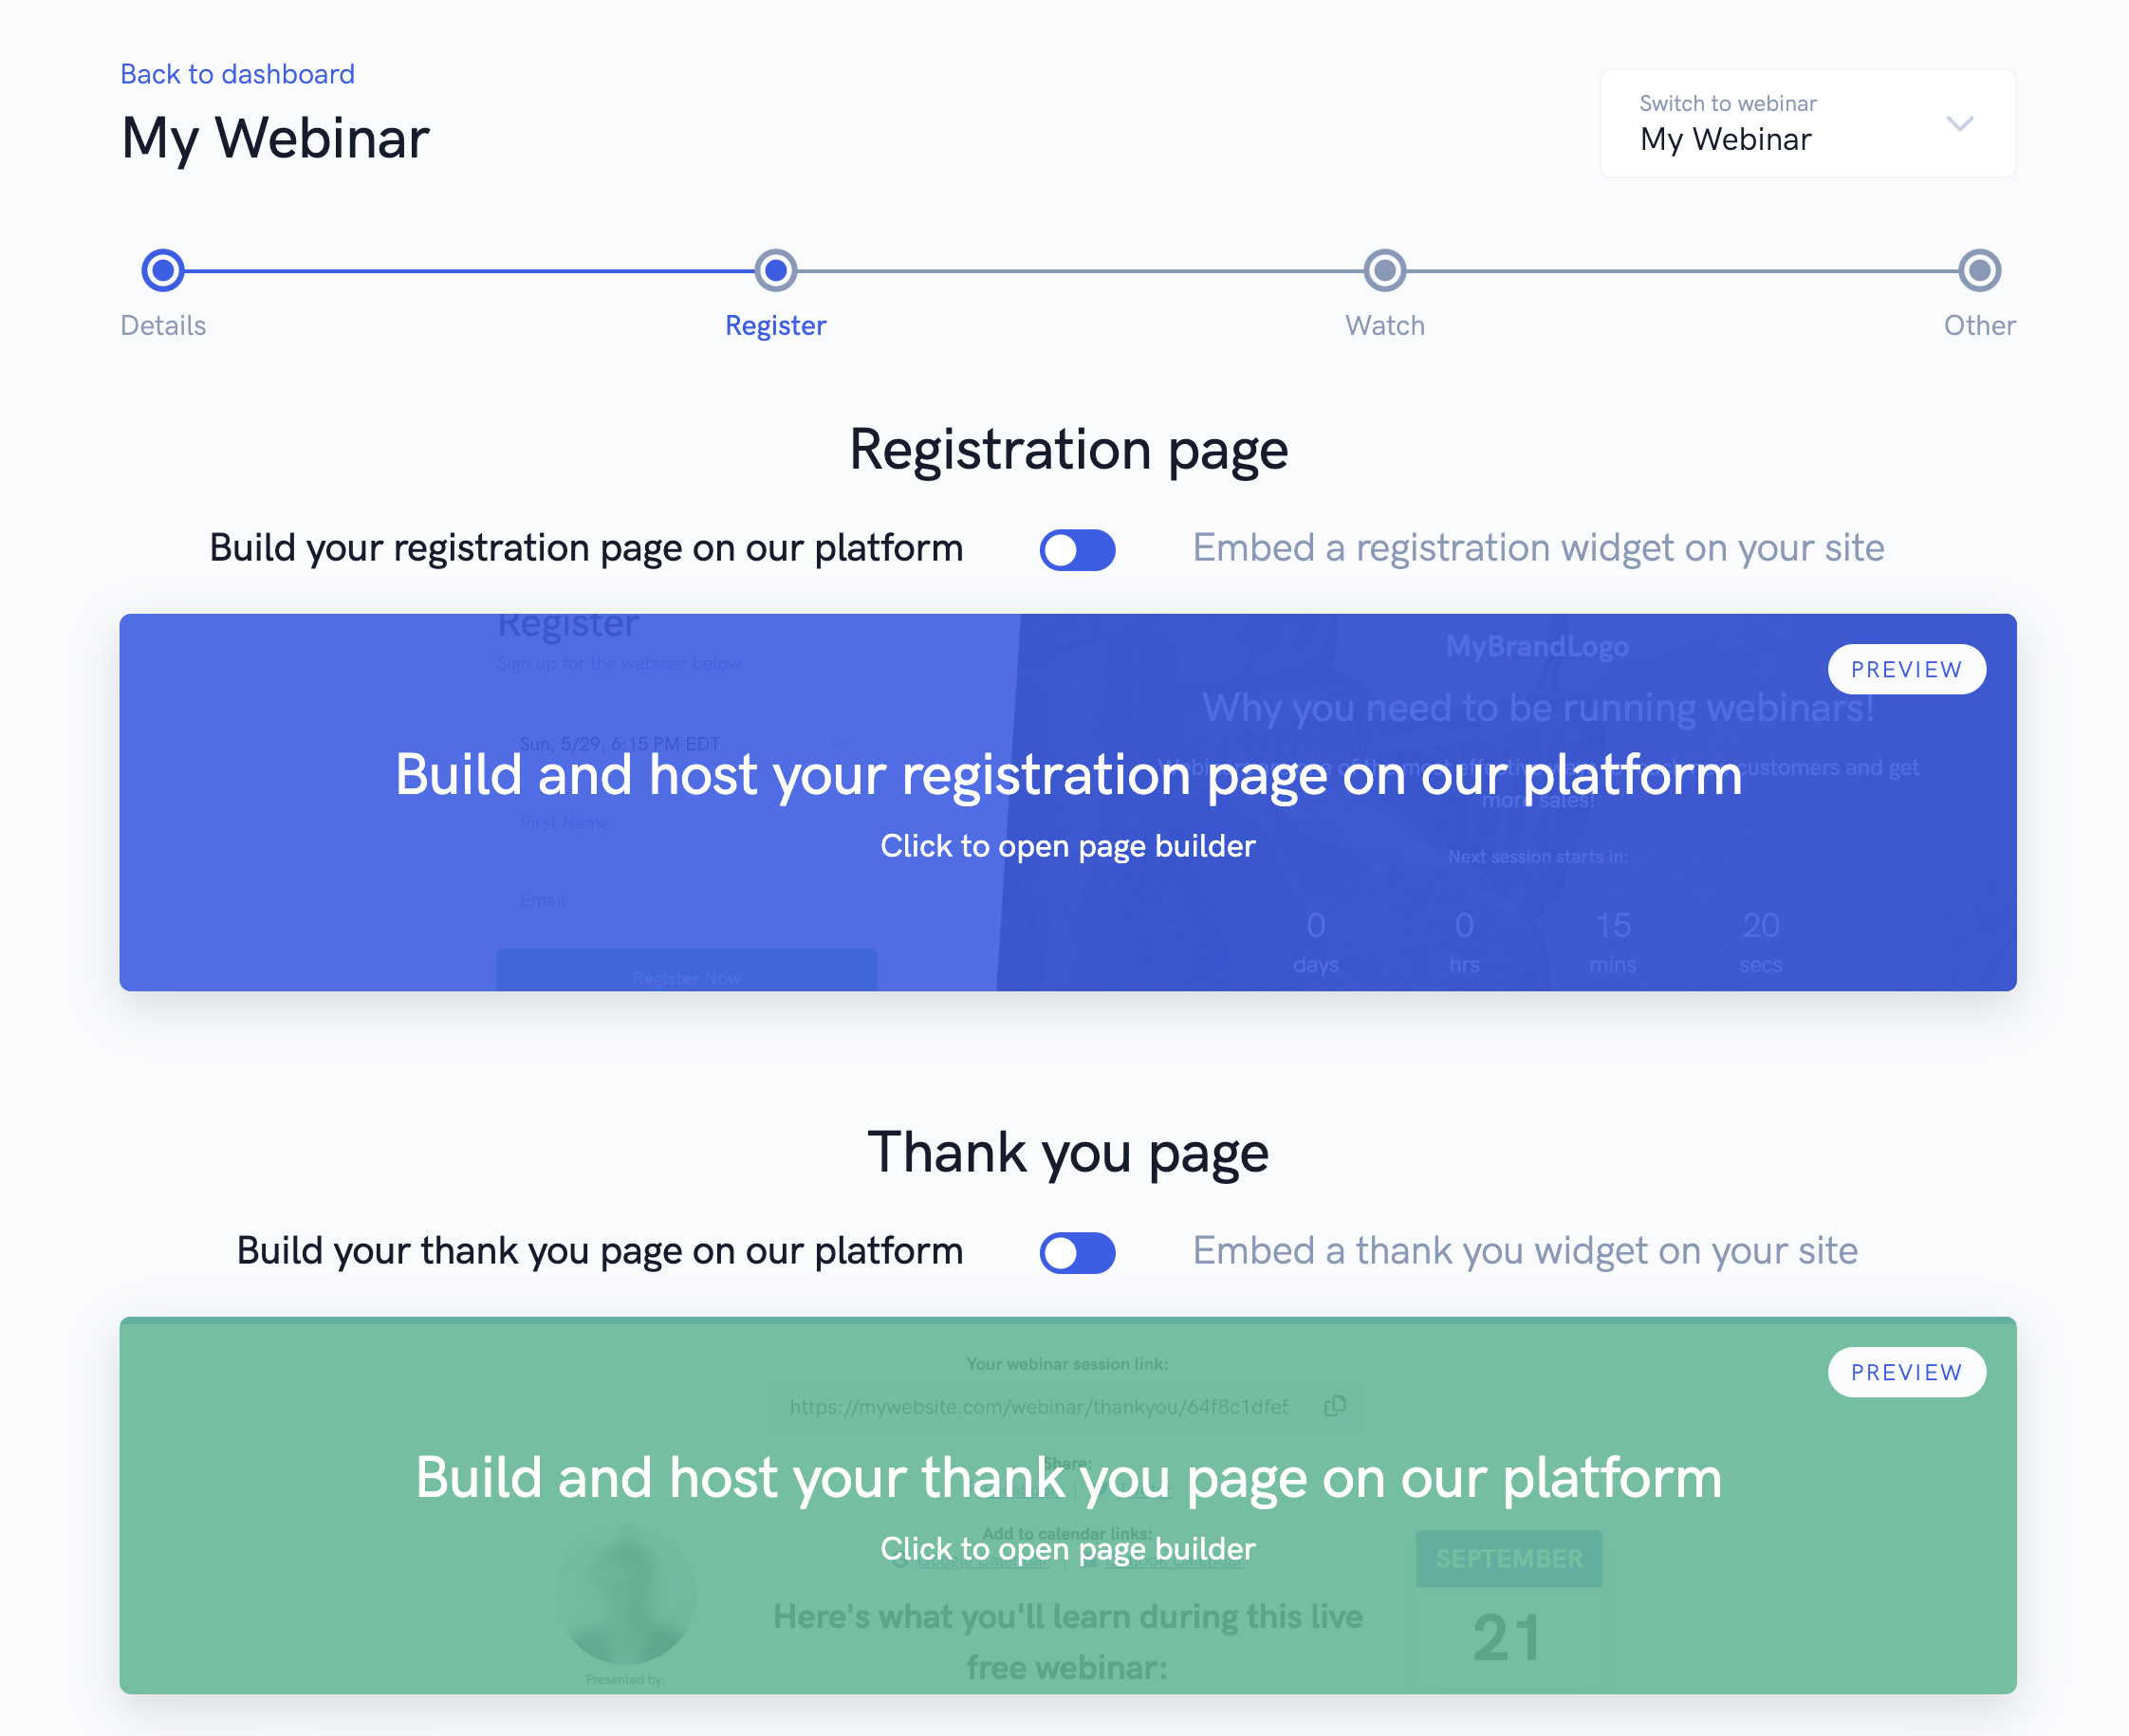
Regardless of whether you choose to use our built-in pages, or embed our widgets onto your own site, our page & embed builders provide a suite of powerful customization options that allow you to fully customize the text, images, videos, buttons, forms, colors, backgrounds, and more on both built-in pages and embeds.
For an in-depth guide on using our page & embed builders, please see this tutorial here.
Editing your webinar: (Step 3 - Watch)
In this step, you'll be shown the option to edit your webinar watch room using our watch room builder as well as edit your replay page with our page builder. You can also choose to embed the webinar watch room on your own site if you wish!
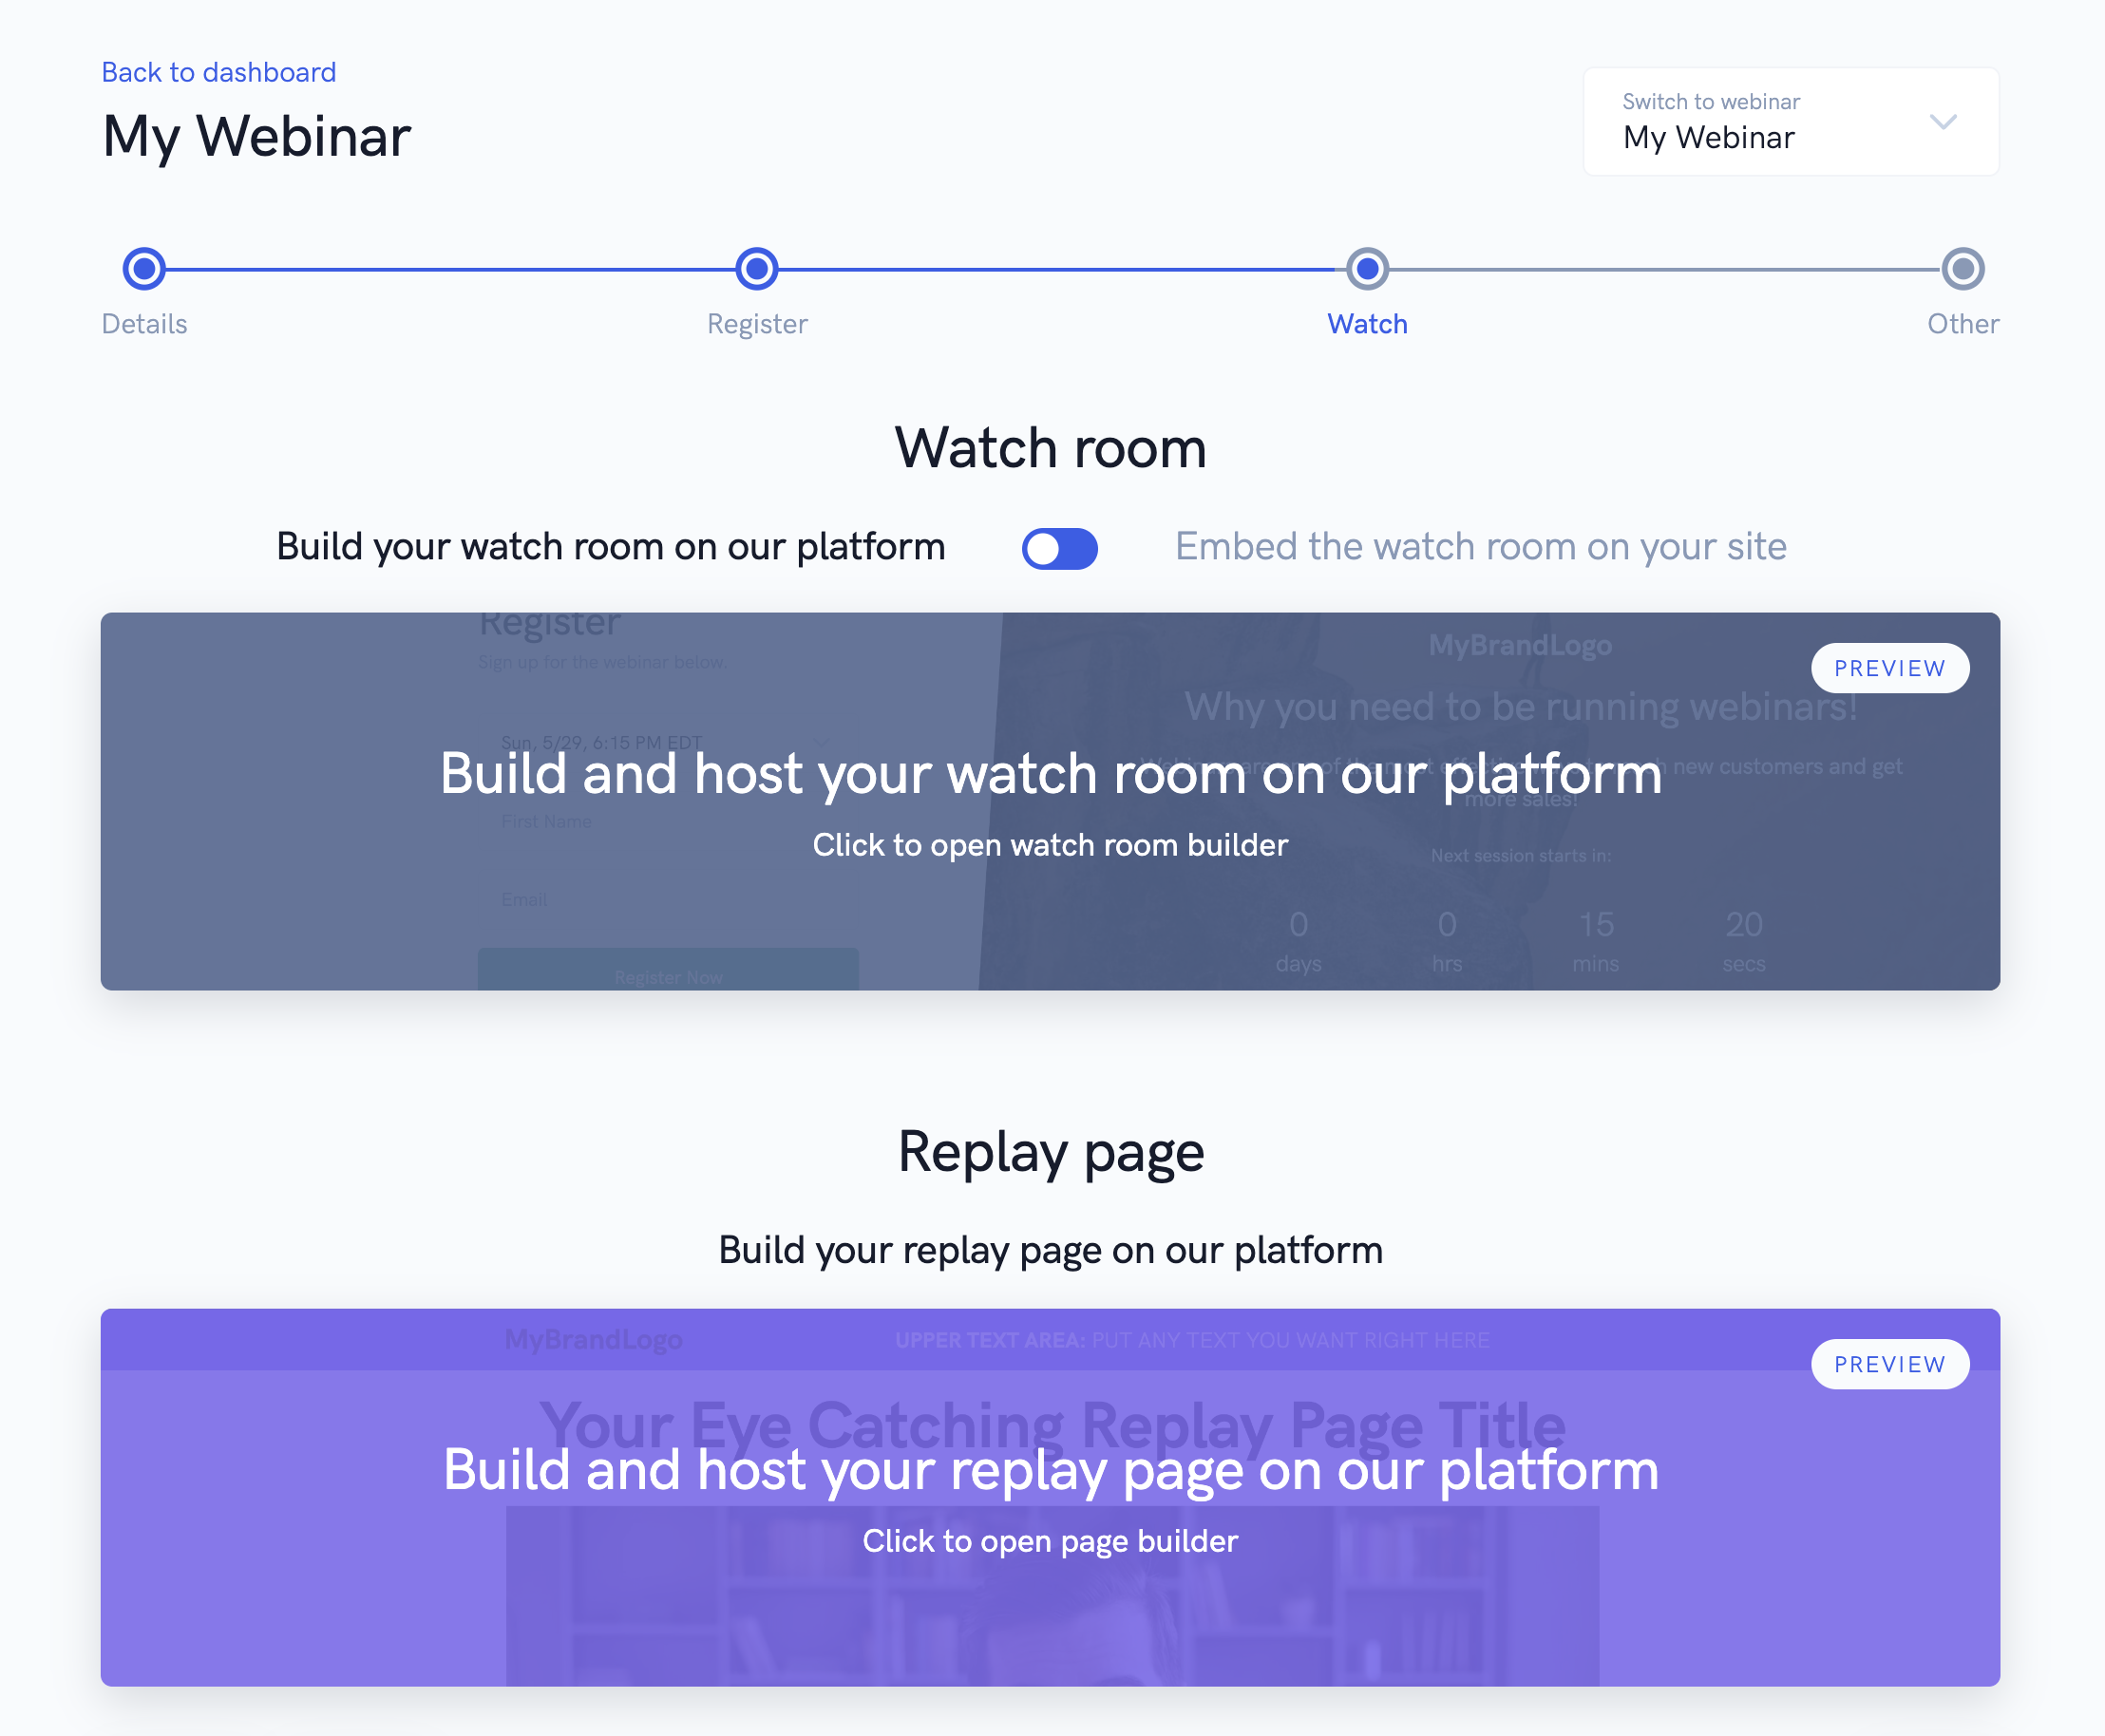
For a very in-depth guide on customizing your webinar watch room, please see this tutorial here.
Editing your webinar: (Step 4 - Other)
On this final step of editing your webinar, you'll be able to set up reminder and follow up emails & text messages, as well as a large variety of events with any of our native integrations or webhooks.

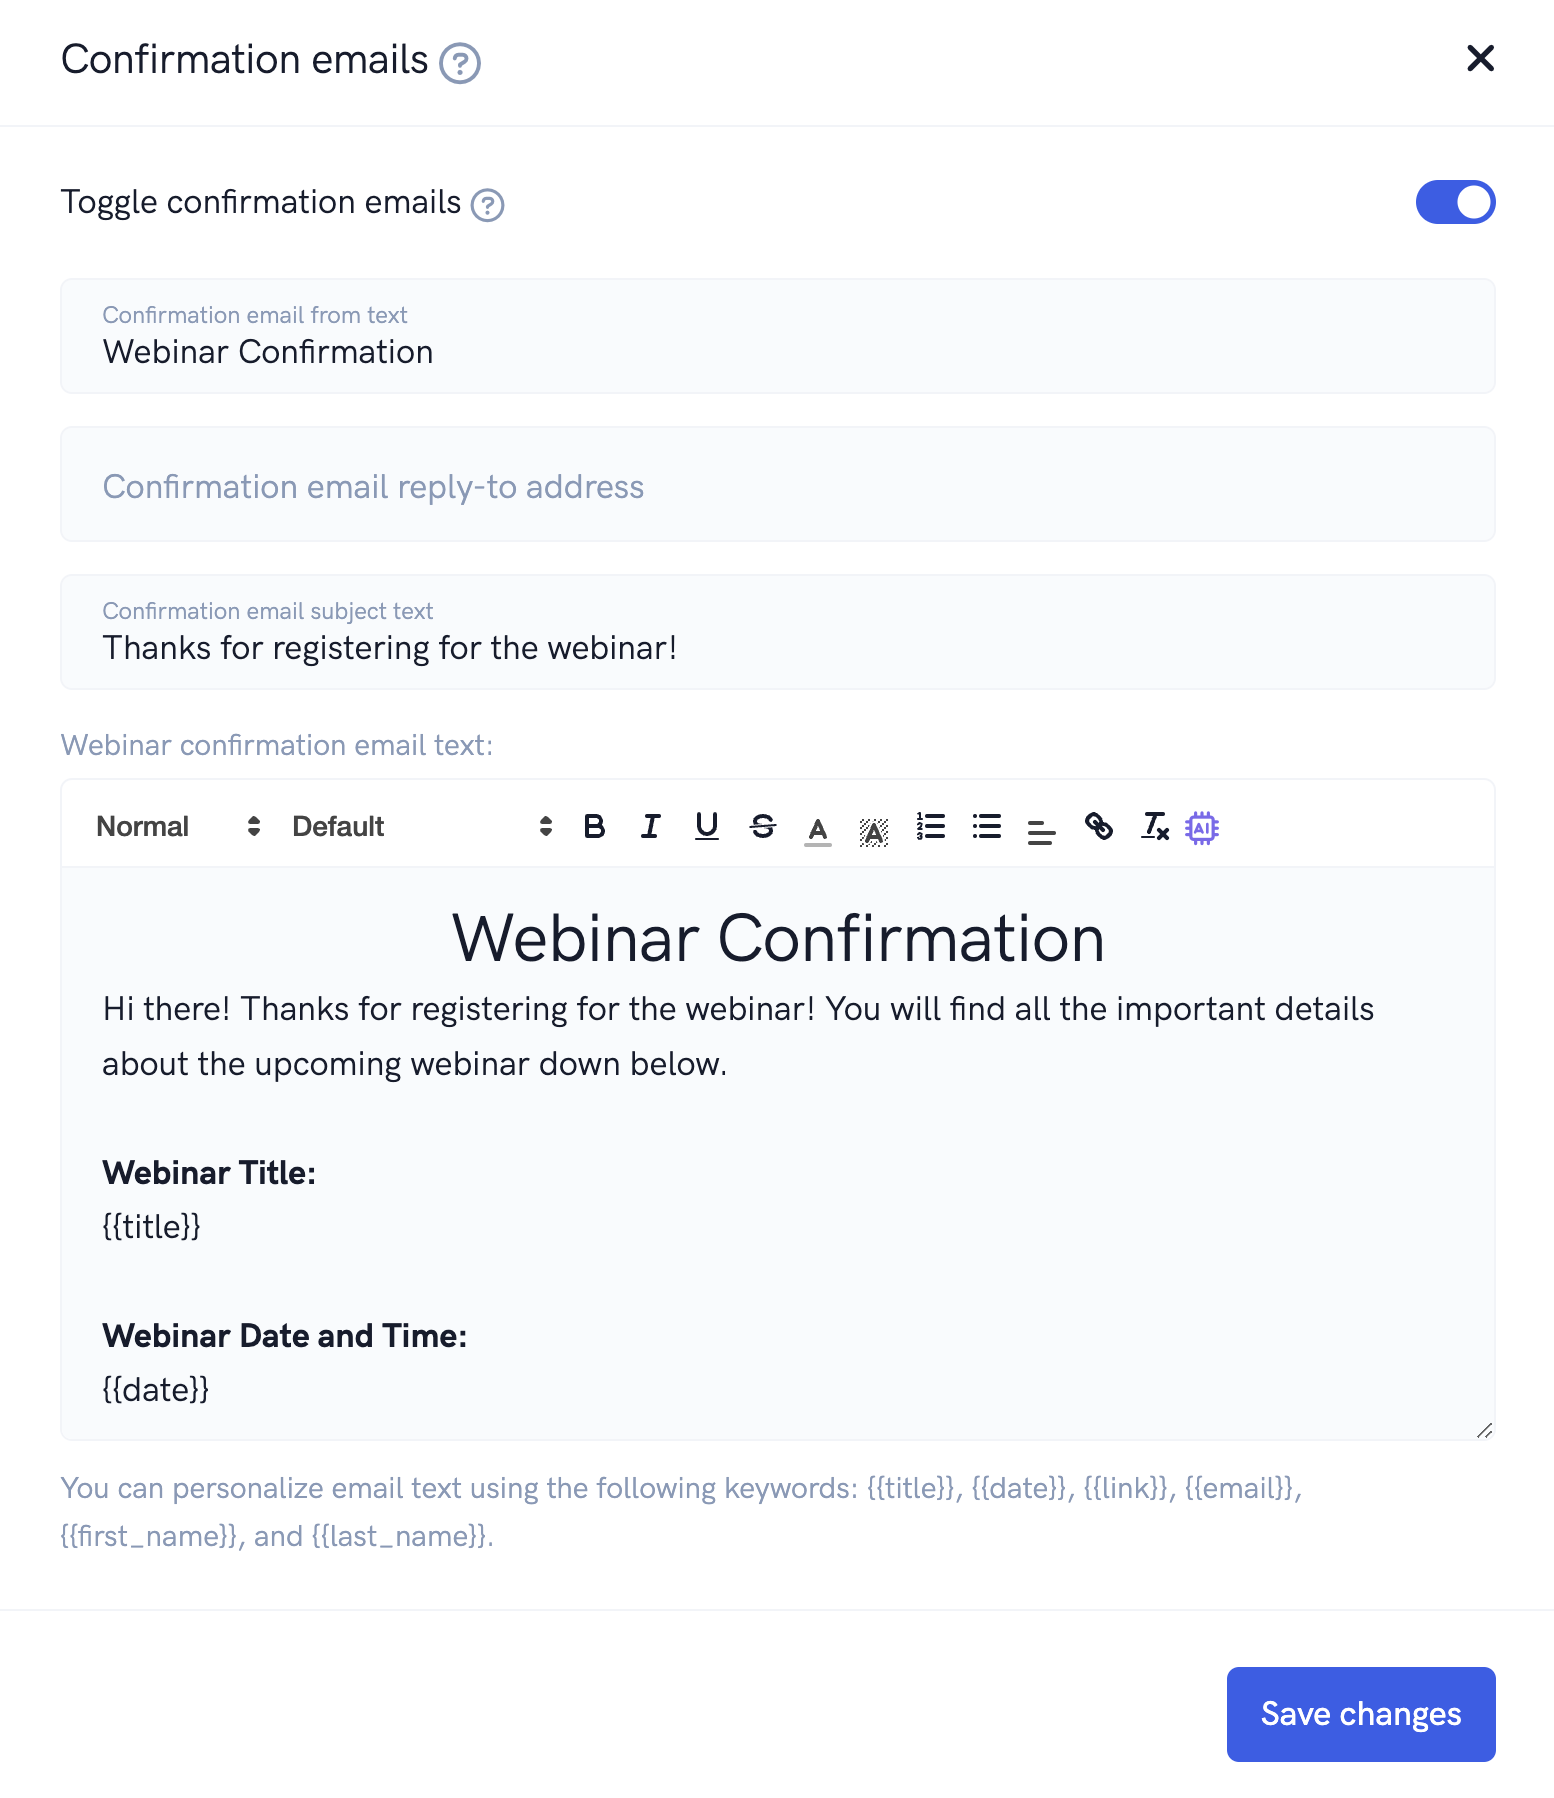
Webinar email notifications
This section affects our built-in email reminders and follow-ups. You can choose to enable or disable emails for a wide variety of events. For example, you can enable confirmation emails, reminder emails for a variety of times, attended/did not attend follow up emails, percentage of webinar watched emails, viewed replay emails, etc...
You can also fully customize each email.
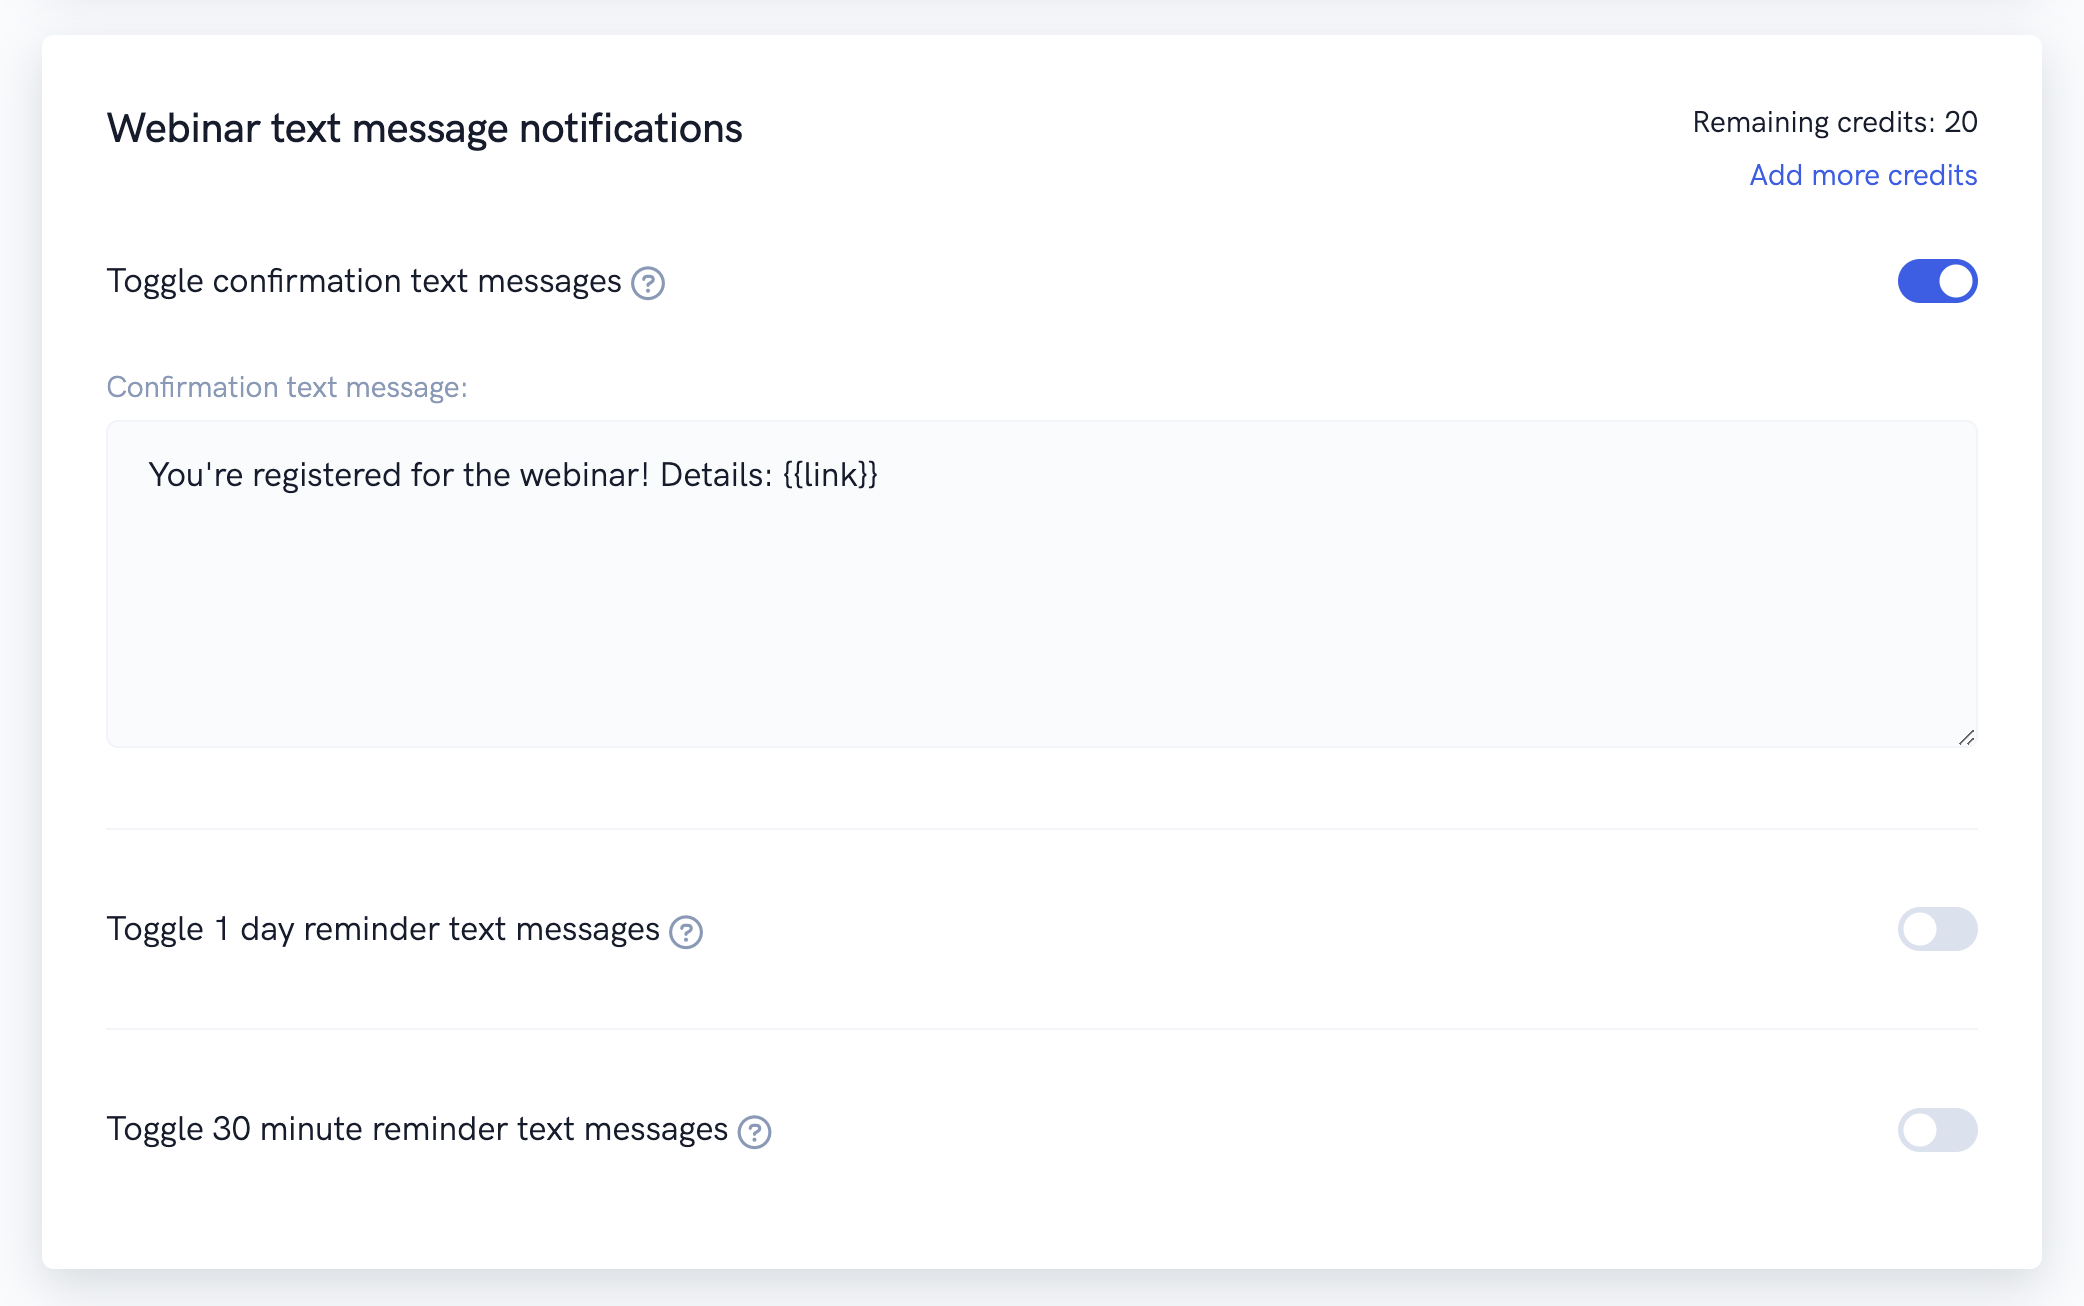
Webinar text message notifications
This section affects our built-in text message notifications. Currently we only support sending confirmation and reminder text messages for your webinar. You can choose to enable/disable confirmation, 1 day reminder, and 30 minute reminder text messages for your webinar.
You can also customize the contents of the text messages you enable.
Webinar integrations
In this section, you can set up your webinar to send data to a 3rd party application via one of our native integrations or webhooks. We support a large variety of events (the same ones we support for our built-in emails). So for example, if you'd like to tag a registrant in a supported 3rd party app after they attend your webinar, you can easily set that up in this section.