If your plan includes video uploads, you can upload your videos directly to our servers. Currently you can upload videos inside the page builder, watch room builder, and your account's media page.
Uploading videos for your webinar
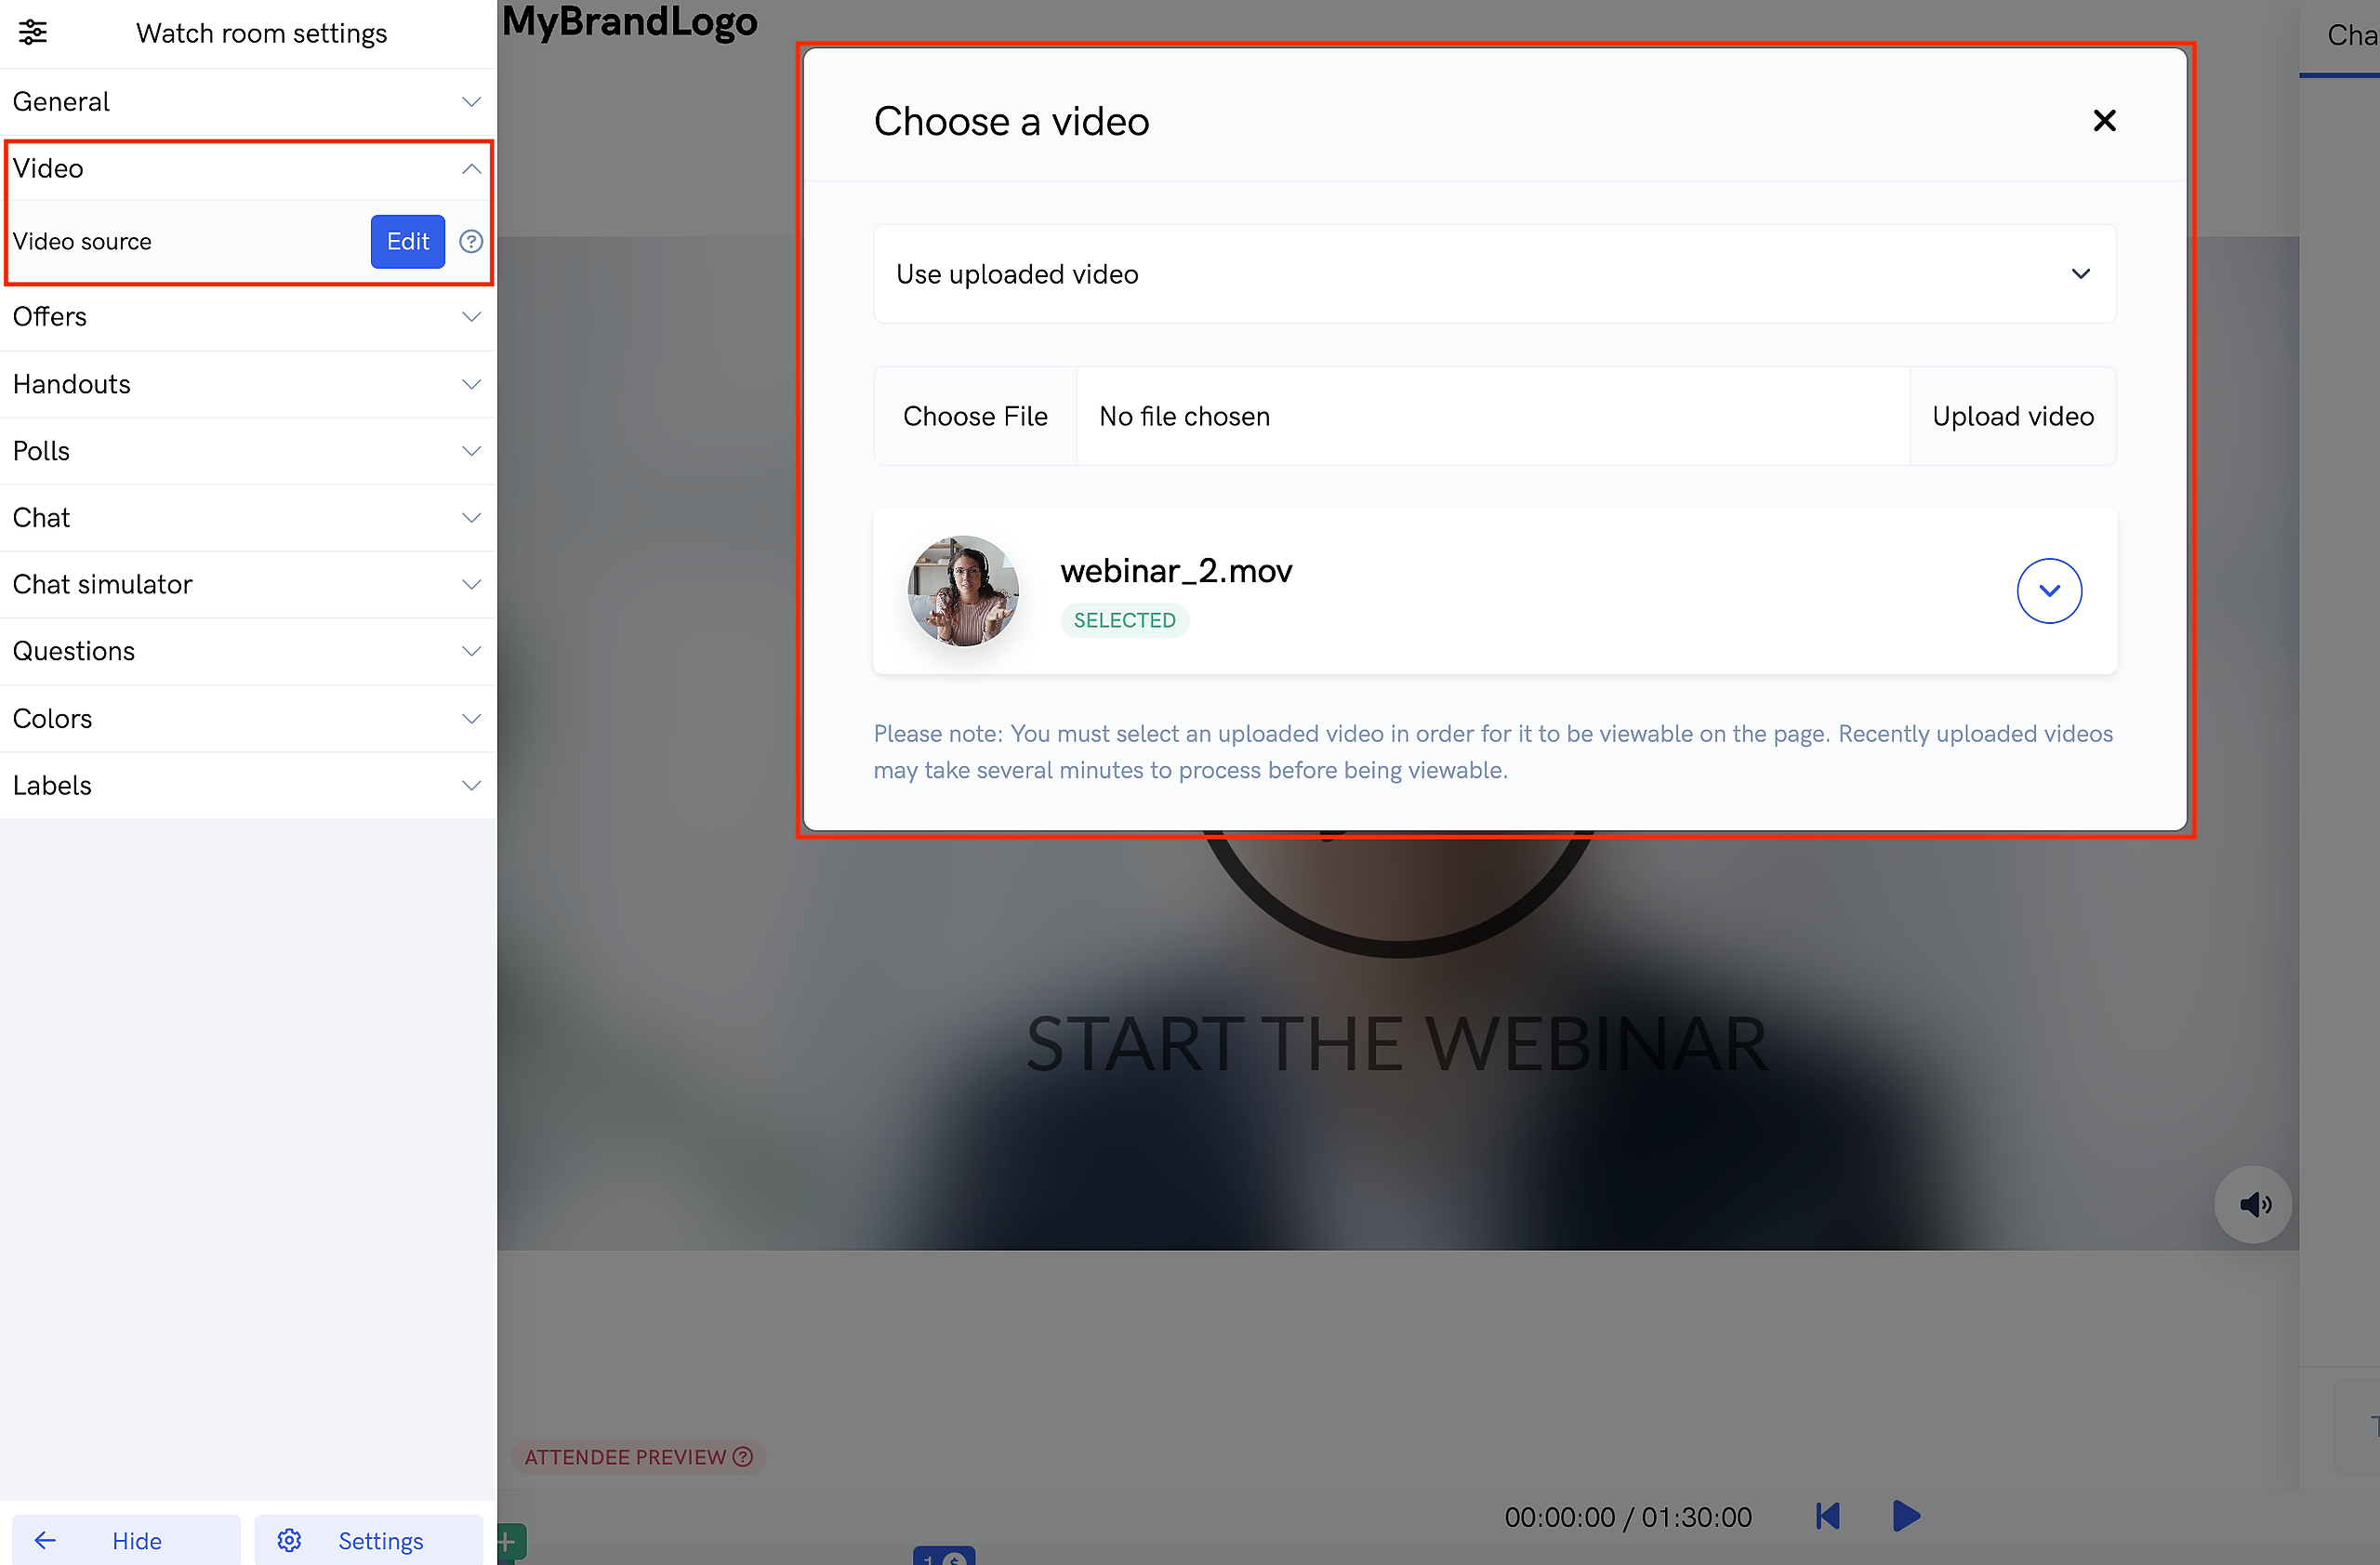
If you want to upload a video for your automated webinar, goto your webinar's watch room builder. Inside the watch room builder, open the "Video" section from the left panel and click the "Edit" button next to "Video source". In the popup that appears, select "Use uploaded video" from the dropdown.
You'll then see the option to upload a new video to your account and you'll also be shown any previously uploaded videos. You can either select a previously uploaded video as the source for your webinar OR upload a new video. Once your video is uploaded, it will be selectable as a video source across all your events and pages. Please note that after your video uploads, it may take up to 60 minutes to process before being viewable on your pages.
Also, please make sure that your video is highlighted in green and says "Selected". This denotes that the video is selected as the video source for the webinar that you are editing.
Please note: To upload pre-recorded video or audio that you'd like to present / share during live webinars, please see the section below.
Uploading videos on your account's media page
To get started, navigate to your account's media page from the menu in the top right. Click the "New upload" button and select the video file you want to upload.
Once your video is uploaded, it will be selectable as a video source across all your events and pages.
Selecting previously uploaded videos on your registration page, thank you page, replay page, etc...
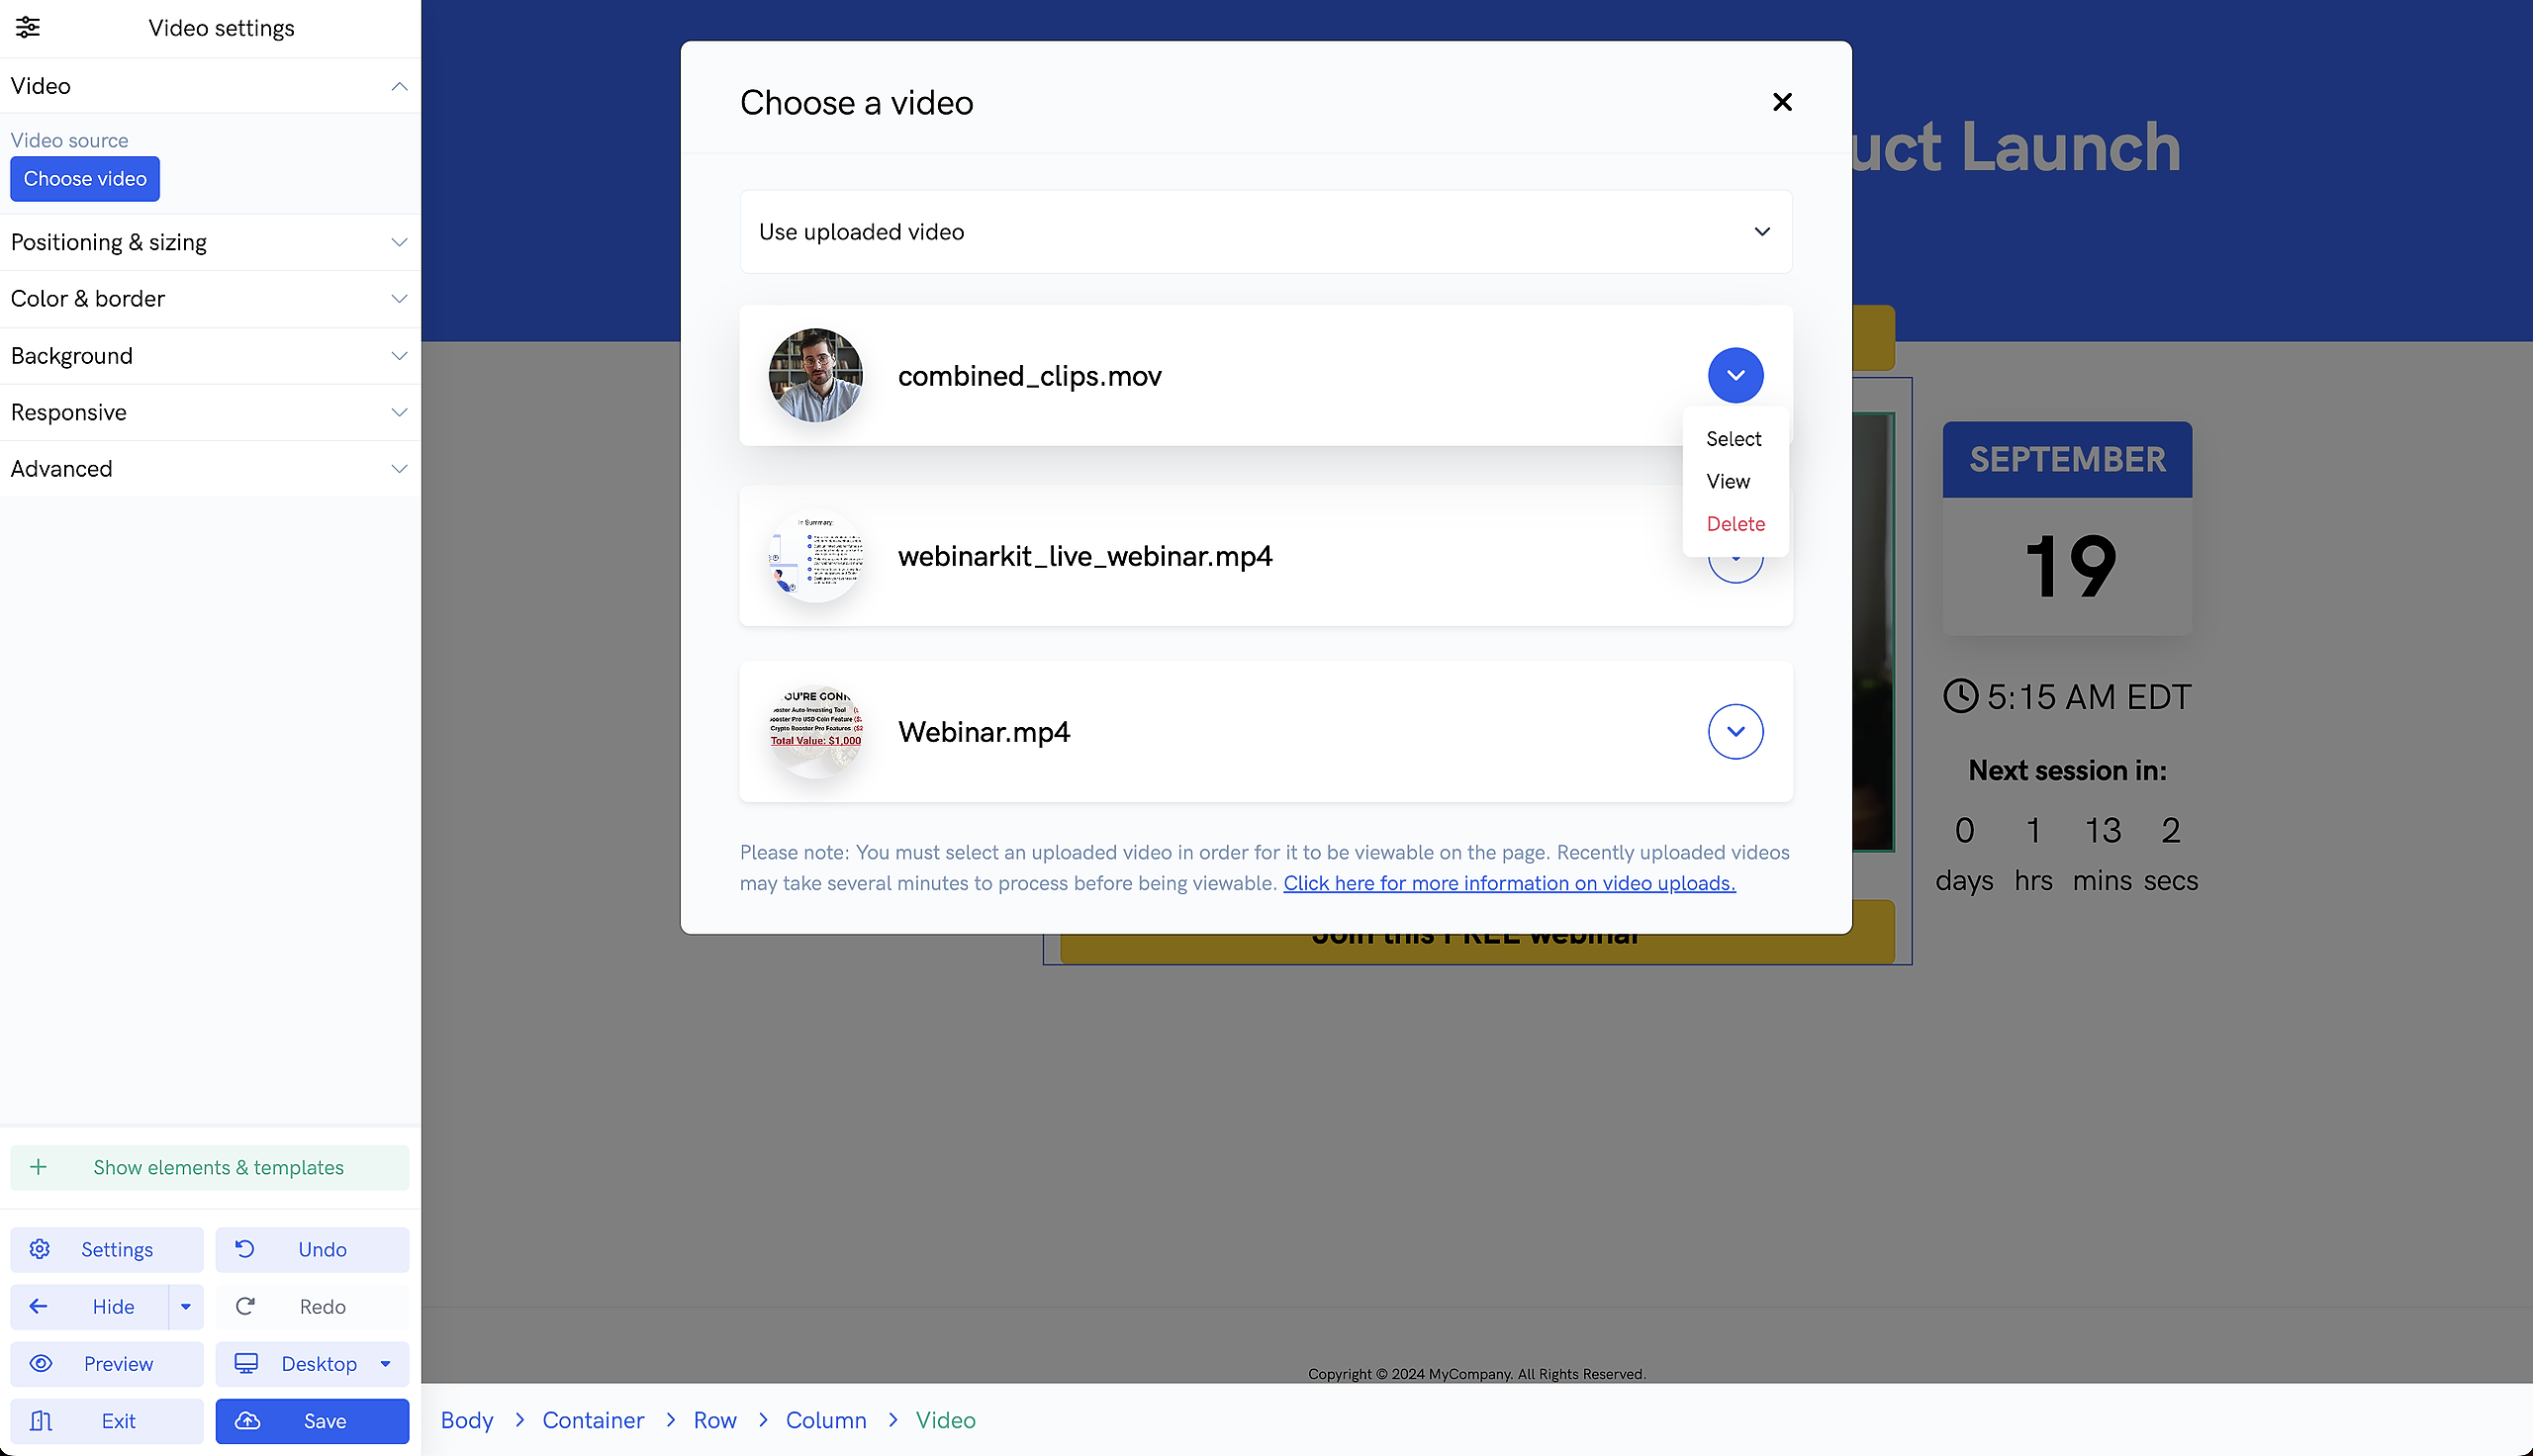
Our platform allows you to add videos to any page or embed built using our page & embed builders. Simply navigate to the page/embed you want to edit, add or select an existing video element on the page/embed, and then click the "Choose video" button from the sidebar. From the popup that appears, select any video that you have previously uploaded to your account.
Then simply save your page and that's it!